Friday, June 10, 2011

Marble Painting

I needed a quick project for my kindergarten students, so we did marble painting. I love this project for showing them Jackson Pollock, and they have a lot of fun rolling the marbles on the trays. I had them use plastic spoons to get the marbles transported to and from the paint and trays to try and limit the mess. I also told them to be careful not to tilt the tray too quickly or the marble will escape, leaving them responsible for cleaning the resulting trail of paint.


To see our gallery, click on Willow River's Artsonia link on the right.

Monday, June 6, 2011

Pour Paintings-Results

I'm sorry to disappoint, but I did not get any photos of the finished projects before I needed to send them home. Oh how the end of the year is coming quickly! As suspected, the paint did crack. I was sad, but the kids loved it! I sprayed some clear spray paint over them to try and keep them intact a bit. One kid started picking at his paint chips and discovered that it actually looks really cool underneath! The paint dyed the wood, leaving the same pattern on the wood without the depth of the paint. I'm thinking I'll buy some Acrylic for next year to try this with-that's what Holton Rower's paintings use.

Tuesday, May 24, 2011

Pour Paintings

One of my fifth grades tried Holton Rower's Pour Paintings today. I'm hoping that they will dry ok. I'm a little nervous that they will crack a lot, but it's all about the process, right?! We did our mini-using small wooden cubes and some makeup containers that were donated. Students hot glued them together and put them on a plate covered with foil so I'll be able to remove the plate later. I loved how amazed they were by the video. Then I heard a lot of "that's so easy!" I reminded them to pour consistently and as close to the middle as they could. They definately figured out it is not as easy as it looks!


Monday, May 23, 2011

Clay Birds

Many of my fourth graders are finished with their clay birds, and I have gotten some of them uploaded and published to Artsonia. I showed them how to mix a tint (lighter shade of a color) for their bird's belly and then encouraged great craftsmanship through the painting process. Most of them did an outstanding job painting these little guys! I could tell by their concentration and the quietness of the room that they were taking it very seriously.


Throughout the creation process we were referring to these as their "owls," and some kids didn't want to deviate from the original concept when it came to painting time and asked for brown or black paint instead of the bright rainbow colors I had already poured. I could understanding wanting to stick with the idea in their heads, so I got the other colors out. They turned out great.


To see our whole flock, check out Willow River's Artsonia link on the right.


Kindergarten Monoprints

Today in Kindergarten we made monoprints. As I was explaining what printmaking is a little boy rose his hand and said "So it's kind of like a printer? It puts the picture on the paper?"


Exactly.


We used plastic inking trays as our plates and painted with Tempera paint. I let them use some comb like tools that were left here from the previous teacher to make patterns and designs in the paint before putting their paper on the top and pressing it onto the paint to make their image. I asked the children to make at least two prints before cleaning up, but many of them made up to five of them!


Painting the plate.


Making lines in the paint.


Paper is placed on the paint.


Press the paper down all over.


Pull the paper off to reveal the masterpiece!


I plan on using this technique with my kids over the summer, using a cookie sheet and Q-Tips.


Thursday, May 19, 2011

Spray Bottle Paintings

Dontcha just love it when you plan a project thinking "Yeah, they'll probably like this. I think." and they love it. Not just love it, but create many, many copies of the project? I especially love it when that happens with my adapted art classes. So many of my objectives with those classes are to help the children grow in areas they are just fine at not growing in, thank you very much. Stretching themselves is especially hard for these kids, so many of my lessons are greeted with resistance. Today, however all but one kid created multiples of the project! Even my most severe young student picked up a spray bottle and started her own second project! She usually waits for her classmates to be done with their project so she can go back to class. It was so rewarding to watch these kids flourish today. Seriously, I'm kinda on a little high from it. All we did was use spray bottles of red, yellow, and blue liquid watercolors to spray large pieces of paper. I had three stations set up that I thought would be easy to clean up (ha!). One on my white board (easy-ish, once I remembered to move the markers!), one in my trusty kiddie pool (super easy!) and one on a wall that I taped large paper over (not easy at all! Make sure the paper goes all the way to the floor! I'm gonna have to bleach my wall. Oops.) We taped paper to the station, handed the child a bottle of each color and let them go to town. I'll post the results later, as they aren't dry yet. Beautiful, vibrant colors.

Press Here

My school's wonderful Media Specialist showed me this book this afternoon. It is hilarious, and I can see an awesome project in the works! Maybe something about color mixing with the younger kids at the beginning of the year next year. Or an actual interactive book with the older ones. I think my three-year-old would love the book too.

Silk Hoops


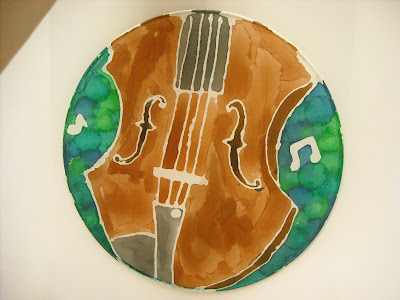
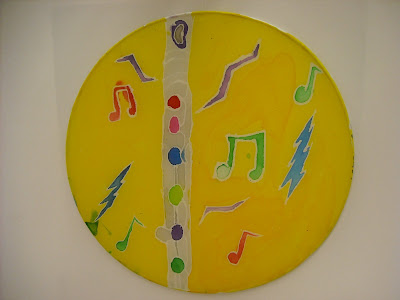
I love this project. Honestly, the hardest part about it is deciding on subject matter. Everything turns out great. I've done under the sea, jungle, radial imagery, and now music. We went with music this year to go along with our Young Author's Day, which is tomorrow and a big deal around here. The kids wrote books that are displayed in the Media Center, and will be doing workshops with professionals throughout the day tomorrow. These are hanging in the windows of the Media Center, which also over look the Atrium.


If you haven't tried this project, it is sold as a class set with 30 hoops, dyes, resist, paint brushes, and eye droppers through School Specialty. I'm sure other companies sell it too, but I do most of my ordering through SS. I created a design sheet by tracing a hoop on an 11" X 17" paper. I instruct the kids to fill the space, and not get too detailed. They trace their design with Sharpie, so they can see through the silk to the design and then trace it onto the silk with resist. Next class, add the dyes, final class take off the resist. You just need to soak it in hot water and rub a little to get it off. Once you try it, you will be hooked!


Clay Ducks

Kindergarten just finished their clay ducks. Well, more accurately, I finally finished hot gluing their eyes and beaks on. I had to laugh as I was writing down the kids' names and getting their "ducks in a row" to photograph for Artsonia when I noticed they looked like this:


Quack quack!