Thursday, May 24, 2012

Writing? In ART?

I did it! I graduated with my Master's a couple of weeks ago. Sorry to be so AWL all year, but I'm hoping to rectify that in the coming school year. 

I have my first ever student teacher in the fall. She came in so we could size each other up meet a couple of weeks ago. She seems nervous (of course) but also like she will be great once she settles into teaching. I just wish it was more than six weeks. With the kids on a six day cycle, she'll only see each class 4-5 times! I'm hoping with a student teacher I will be able to work on curriculum building, assessment, and technology. At least I was, until we specialists had a meeting with our principal a few weeks ago. She wanted to give us a heads up on the new Wisconsin State testing that is coming in two years. WKCE (Wisconsin Knowledge and Concepts Exam) is out, and a new system is coming. Apparently fifth graders are going to be expected to be able to sit down and type two pages in one sitting. Seriously, I know college kids that can't do that! Anyway, our principal wanted to let us know what is coming so that we can work on ways to integrate writing in our content areas. As I told her, that's easy in art if I had the time to do it, but with only 25 classes (assuming there's no field trips or snow days) a year, that's a pretty tall order. I have been working on writing integration since our meeting. She said a goal of once a trimester would be a good start for next year. Pinterest has helped me find a few good ideas. I'll share my plans now, in case any of you are also looking for more ideas, and I'll share the results and how it was taught once we do it with our students. 
1. FAKEBOOK: I LOVE this idea! I only have one wish: that I could create a school data base of these pages and the kids could link to each other's pages instead of just having "friends" listed. Perhaps in the future...My concern about this was that a lot of artists have done and said some pretty stupid things publicly that I wouldn't want my students discovering on my watch. Therefore, I am creating a class website on Google sites that has artist pages sorted by years, style, and artists. Each artist page has two works of art, a brief bio, quotes (if I can find any elementary appropriate ones!), and known acquaintances. Kids will use my site to choose an artist, create a Fakebook page and then do a project based on the artist of their choice. I just started working on this, so I only have a couple of artist pages done and none of them are published. When it is complete I will be sure to post the link so all of you can reference it too!
2. POST-IT CRITIQUE: This idea really inspires me. Kids can write a question, comment, or suggestion on a post-it and put it on another student's work of art. I'd certainly have to have strict guidelines about positive comments, but this could be amazing. I was perusing the Lakeshore catalog today and came across these magnetic clips that would be perfect for hanging the art on the white board. I happen to have my tables labeled in the same colors these clips come in. I'm going to order two sets (there's six kids to a table) and the kids will hang their artwork from a clip that matches their table color to make it easy to pass them back at the end of class. I'm thinking everyone puts their completed project up and we start another project. Then the kids go up one table at a time and put up three post-its. One question, one comment, and one suggestion.
3. I also want to start a sketchbook/journal with the kids. I was thinking of using jumbo index cards. The kids can design the cover the first day of class, and each index card can have a hole in the top corner. They'll be held together by a jumpring with a ribbon on it that matches the table color the student sits at for easy passing out. In addition to this idea of images, some days I can ask the kids to compare/contrast two works of art that are on the SmartBoard. I figure it's an easy way to get the kids focused right away when they come in the door, and keeps them occupied while the stragglers come in. With back-to-back classes it could also help with me needing to get out or put away supplies.
4. Finally, I saw this post on Pinterest about weaving with magazines and thought it would be fun to have the kids write a poem or story and weave it into a painting. This is very much in the development stages, and I've been focused on the website so I haven't given it much thought yet.

I'd definitely be interested in all of your writing integration ideas if you have any to share! I found it ironic that I've been working on all of this integration and this week a young student said I'm not a "real teacher." When I asked what he meant he said "Oh, I mean you don't teach the real stuff, like math and reading." I replied "Yes, I do. It's in every lesson, you're just having so much fun you didn't notice."


Wednesday, January 18, 2012

Willow Art Show Preview

I've spent my morning researching living artists, hoping to find inspiration for an art show inspired by them. All I have to say, is I am so sick of shock art! Seriously, maybe it's because I have two girls ages 3 and 2 and I don't really want to bring them to an art museum filled with genitalia or maybe I'm just getting old, but I am sick of it! It's old news, how about something creative and fun that can be introduced to elementary school children?

Ok, rant over.

Here's what I found that is inspiring AND age appropriate for my little cherubs. . .


Kindergarten will be making stone scupltures based off the work of Daryl Maddeaux. This will be so perfect, as one of the fourth grade teachers is working with several grants to create a raingarden in our "Cinder Lot" play area and this will be Kindergarten's contribution to that too. Special thanks to Princess Artypants for this post, which is where I got this idea.

First grade will create layered painting via Gerhard Richter. I'm thinking pallet knife/cardboard scraping the paint to get similar results.

Princess Artypants to the rescue again! When I referred back to her blog for the Kindergarten lesson I found this new post on the artwork of Edward Said Tingatinga. Beautiful! Although ES Tingatinga is no longer living, his sons and many other African artists continue producing artwork in his style. Way better than the pipecleaners-as-neon-signs project I was thinking of about Bruce Nauman!

Third grade photo collages a la David Hockney.

Fourth grade pour paintings inspired by Holton Rower.

Unlike all the other grades, who have yet to complete thier projects, fifth grade just finished using Romero Britto as inspiration for thier silk hoop batiks (link is to last year's music themed hoops).

As with many big events, it's possible that these ideas will be tweeked, revised, or even completely ditched prior to the big day.

Thursday, January 12, 2012

TP Snowflakes-Part 2

 I thought I had already posted the final snowflake projects, but apparently I just thought about posting them. We finished them off by painting them with white tempera paint and sprinkling some clear/white glitter on the wet paint. They are currently hanging from each other in long strings of snowflake in the window to our school office.


Wednesday, December 14, 2011

Favorite Classroom Tips

I get tips from all of your blogs all the time. Two such tips have completely transformed my classroom environment. I wish I could remember which blogs I got them from, if it was you, please let me know so I can send some linky love your way.


1. Use wipes to clean the tables. I'm sure landfills everywhere disagree, but using wipes is amazing! It easily cleans off even dried paint, and the kids are so excited to use them. I tell them I will pass out a wipe or two to each table after all the stuff on the table is put away. They rush to get it all put away so they can come up and get a wipe. No more lakes on my tables! As an added bonus, the whole room smells fresh and clean after 20+ kids use a baby or Chlorox wipe on their table spot.


2. Use a magazine as a pallet. SERIOUSLY?! Brilliant! Simply rip off the top page and toss when the kids are done painting with it. Viola. Done and done. I hate cleaning pallets so much, I almost shouted out loud when I read that idea! And to think, all the new supply catalogs are coming out right now. A perfect way to recycle outdated or multiple catalogs!

Monday, December 5, 2011

TP Roll Snowflakes~Part I

Usually my Adapted Art lessons are "one and done" type of projects. The kids like to take them with them as soon as possible, and I like to accommodate. However, today we are starting a two part project recycling TP rolls into snowflakes that look quilled. Here's step one.

Students should write their name on the inside of a piece or TP roll
(I cut them about 1/2 each).

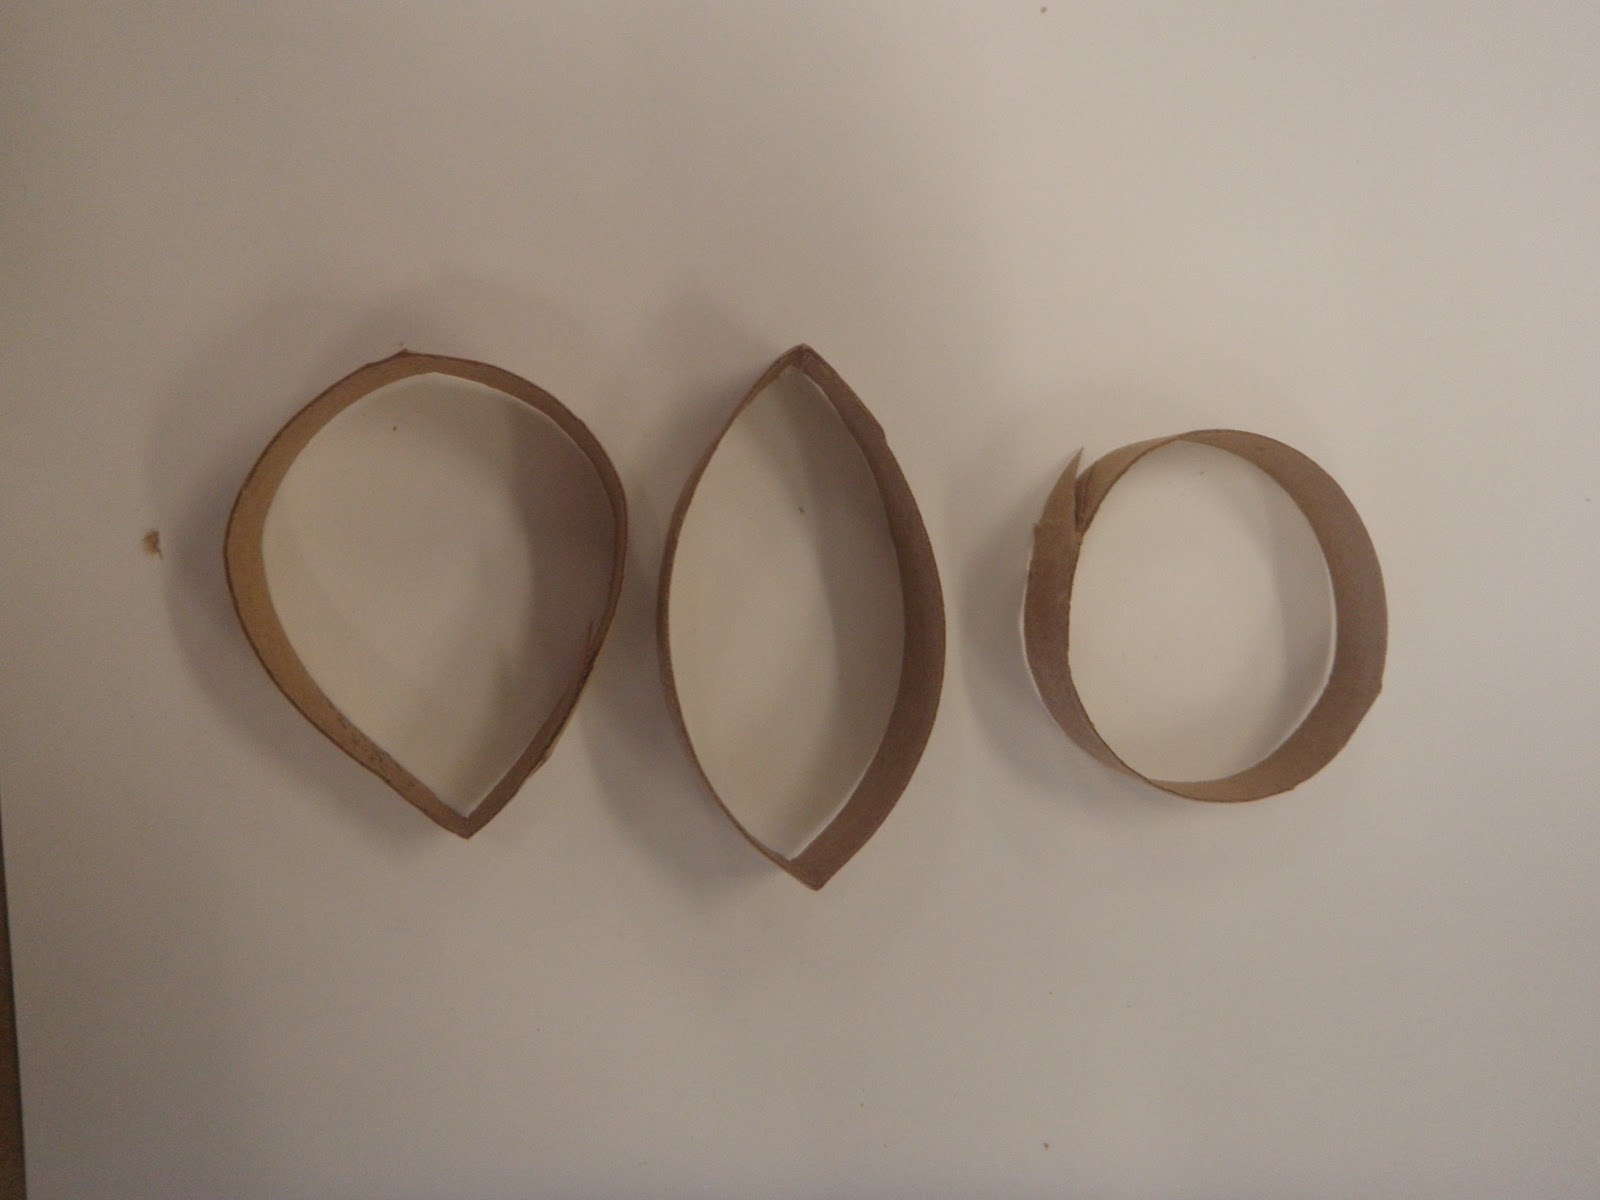
2. They can make three different shapes from the TP strips;
keep it round, pinch one side, or pinch both sides.

3. Put a drop of glue on the shape they've created.

4. Press the glued spot to the piece with their name on it.

5. Add a paperclip to hold it for them so they can keep working.

6. Add their next piece, gluing it to the center and the first piece that was glued.

7. Paperclip all the glue spots.

8. Continue until they have made a whole snowflake.


 OPTIONAL: Add spirals
UPDATE: Unless you plan on spray painting them, or leaving them their original color I'd recommend skipping the spirals. Brushing on paint causes them to become too wet and straighten out.


1. Cut a circle into a strip.

2. Roll the strip around a pencil.

3. Hold it on the pencil for a moment.

4. Glue it to the snowflake and add a paperclip to hold it on.

5. End of step one!


Click here for our project inspiration.

Thursday, November 17, 2011

Kumihimo Weaving

While attending our local Art Fair this fall I talked with a fiber artist that was selling pocket looms to create Kumihimo Weavings. I had never heard of them, so I looked them up and it is a Japanese style of weaving. I found some videos online and there are many sizes of looms and they can be created with many different numbers of strings. You can use embroidery floss, yarn, ribbons, or even beaded strings to create these.

My third graders used Foamies to create their pocket looms and then embroidery floss for the actual weavings. It is such a hit, even kids that don't put a lot of effort into art have been asking to bring them home to work on them more! Some kids have finished, and within two days approached me to show me more weavings they've made on their looms since bringing it home. One teacher even told me she's noticed kids in her class have started making friendship bracelets since we started this project.


 Many kids made theirs long enough to go around their wrists twice.

This student loved the process so much she made a cardboard loom at home and completed that weaving before the one she made in class!

Some students got more creative with where to display their weavings.

I created a stop motion video on the whole process. I highly recommend this project for your students!


Wednesday, October 26, 2011

Adirondack Alcohol Inks

When I found this image in Pinterest, I had to try it out. I a little discourage when I found out that a small, three bottle package of Alcohol Inks are $9.99! Ugg. I kept it in the back of my mind and continued as normal until I found this pin on how to make your own alcohol inks. Amazing! Perfect! Exactly what I wanted to do at a tiny fraction of the cost! I went out the next day and bought Rit Dyes and Rubbing Alcohol galore at Wal Mart. I'm fairly certain the clerk thought I was nuts to be buying three economy sized bottles of Rubbing Alcohol, but she was nice enough not to say anything. I rushed to work the next day, completely excited to try out all I'd learned.


Total disappointment.

I could not get the dye to completely dissolve into the alcohol, leaving the tiles gritty, transparent, and downright ugly.


Sigh.

I gave in last night. I went to Michael's and bought the good stuff (thank goodness for that teacher discount!). I am so glad I did! Here's my tinkering this morning. . .

 The needed supplies: Alcohol Inks in various color and blending solution. I was going to use the cotton swabs, but didn't actually use them. They could be used instead of a paint brush to spread the blending solution though.

 First, spread the blending solution on the tile. This will disperse the ink and lighten it so the color is visible instead of being so condensed that it looks almost black regardless of the color.


 The inks come with a pointed tip so it's easy to drip just one drop at a time.


 Loving it! I'm thinking of putting a board of these up over the windows in my classroom. It would be spectacular (and the kids wouldn't be able to reach them!).

They do need to be sealed. I read to make sure that it is a water based sealer, such as Mod Podge because anything solvent based will cause the inks to rub off.

Sunday, October 16, 2011

The Truth Hurts

I got this from Phyl, over at There's a Dragon in My Art Room. It really coincides with what my cohort has been talking about in our monthly meetings. We've been looking at the Finland model of education, which is number one in the world and only tests their students ONCE their entire school career. Something to think about.

Wednesday, October 5, 2011

Neglect

Sorry to be neglecting you all, blogfriends. I have many reason why I haven't been posting~although I'm still searching all of your blogs.
1. I got a new classroom! I'm super excited about it, and loving it~but arranging it and organizing it took up ALL of my inservice time before school started and I still have not caught up with all the work that needs to be done. Now instead of having a room in the middle of the school with no windows (it used to be the stage area when the school was a high school), I have a beautiful room with windows all along on side. Although it's a little smaller, the natural light more than makes up for it.
2. Half of my department retired last year and I have been helping out my new colleagues so they will get a great start on their new careers with our district.
3. I had a baby! Our little boy, Jerry Richard, was born June 24th, so he is three months old now. I pump before lunch, leaving me with only about a half hour to clean up after one class, eat, and get stuff out for my three afternoon classes.


Jerry with his big sisters, Gracie and Brianna

4. Quite frankly, I haven't done anything interesting yet. We're working on lessons that have already been posted about and aren't really all that amazing. We're just getting the basics covered and learning the new routine for the new classroom.

I'm hoping to get caught up soon so that I can start posting again. I did the crayon melt project with my CID students that is all over Pinterest, and I'll post pictures of my new classroom too.