
LEARNING TARGETS:
-Recognize a landscape.
-Experience masking.
-Experience wet-on-wet watercolor technique.
TERMS:
-Wolf Kahn: A living artist that paints primarily landscape paintings.
-Landscape: An image of outside.
-Masking: Blocking off a portion of the paper/canvas and painting over it to leave the area the original color.
-Wet-on-wet: Applying wet paint to wet paper by applying water to the paper first.
MATERIALS:
12" X 18" Watercolor paper
Rolls of painter's tape for each table
Scissors
Watercolor paints
Paint brushes
Water containers/Water
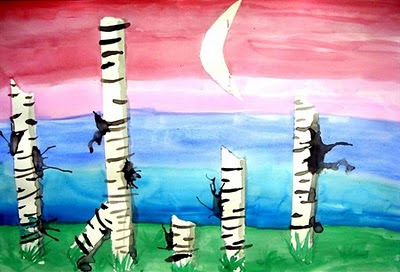
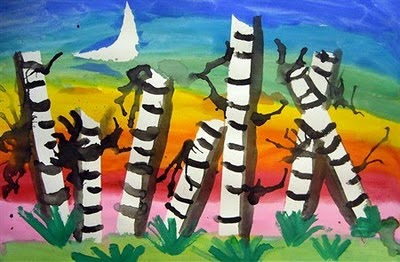
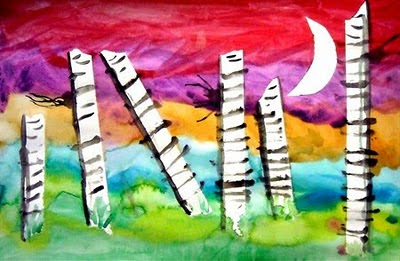
After talking about Landscapes and Wolf Kahn, viewing a slideshow of each we started the project. Students were asked to first put down at least 5 strips of painter's tape, near the bottom of the page. Next, they put pieces of tape together by overlapping them to create a larger piece of adhesive and cut out a moon. When all pieces needed are masked off, the painting begins! Start with the ground, because when the sky is added it will draw the water upwards, making the horizon line look like grass/bushes. I encouraged my students to use not only green, but also yellow and brown in the ground. When the ground is complete, cover the rest of the paper with plain water. Add stripes of color, which should blend into each other on the wet paper. If the paint is not blending, there is not enough water. Students can even lift the paper in different directions to make the paint run.
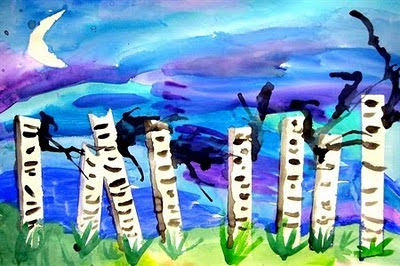
When the sky is dry, the teacher should remove the masked areas to reveal the white paper beneath. Next class, students should be taught additional watercolor techniques to complete the details of the painting. First, they should add the clumps of grass, pressing the brush down at the base of the grass, and lifting it as the blade gets higher. This will cause the brushstroke to get thinner. Next, we talked about the moon being a light source and that a shadow is the absence of light. The kids reasoned that if a shadow is the absence of light, it should be on the side of the tree opposite the moon! I showed them how to use a lot of water and a little bit of black paint to create a gray shadow. TROUBLESHOOTING: if the shadow is too dark, add more water and spread the paint out. If it is already spread out, add more water and dab with a paper towel. Curved black lines should be added along the trees; some longer than others. Finally, the last step is to add a watery dab of paint to the side of a tree and use a straw to blow the paint to look like branches.
ASSESSMENT: While the kids are painting the sky, be sure to circulate the room making sure students are comprehending the wet-on-wet technique. Many will need to be encouraged to use more water and some will forget to use it at all! Completed works of art should be assessed for completion of all steps and craftsmanship.
1 comment:
Great Lessons! Thank you for adding the directions and sharing your talents :)
Post a Comment