Wednesday, January 22, 2014

Paul Klee Non-Objective Drawings


Here is a sampling of my latest project from the 5th graders at one of my schools. My other school is starting it next week. It is inspired by another former colleague. Check out her gallery here.
We started by looking at images by Paul Klee. We first focused on his abstract images such as Castle and Sun and talked about abstract paintings. We defined abstract as art that is based on a subject matter but converted into shapes. We then segued into his non-objective paintings and defined non-objective as art that has no subject matter. 
Next, the kids were asked to draw 4-7 large lines on their paper to break up the space. Finally, we talked about color theory and focused on analogous colors. I explained how to read the color wheel and quizzed them with questions such as "If I am on red, which two colors could I use?" I then demonstrated how to blend the oil pastels and leave a space around the pencil lines for black. I stressed saving the black for last and explained that we didn't want the black to smear into the colors. 
Most of them turned out amazing! Here is our gallery, but you can see some of them below.


Blue Dog

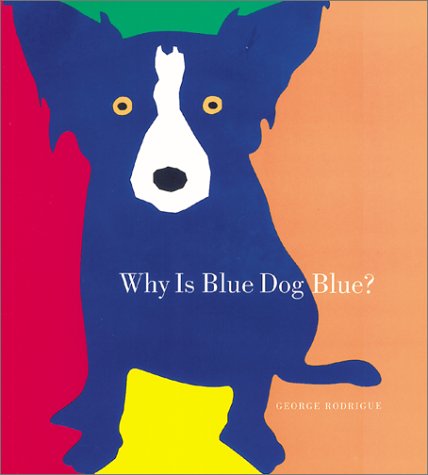
My third graders are starting a project based on George Rodrigue's Blue Dog paintings. I am always so excited to teach about a living artist, which made me extra sad to learn that Rodrigue died in December. 
We are starting our lesson by reading Why Is Blue Dog Blue? by Rodrigue. I was nervous that the book is a little young for third graders, but they loved guessing what color Rodrigue would choose for each of the pages. 

After reading the book, we drew the dogs together. I was using the SmartBoard and the kids followed along. I allowed them to add a collar to make each one unique. We will start painting next week!


Color Wheel Spirals

I got the idea for this project from a former colleague. Her gallery is here. I love the color wheel, but realize that not all people do. I love that this project allows for students to mix their own secondary colors but isn't a boring, generic color wheel. I also love adding the iPad step at the end to add interest for students that might not have been excited about the painting step. 

Here is the video I created using a free trial version of Camtasia. I love Camtasia. If I was in the market for a $300 software, it would be Camtasia. However, I'm not, so now I'm experimenting with iMovie-which is free-much more my price range!


I am doing this project with 4th graders, and they are looking great so far. A couple of classes are done or nearly done painting and will start Sharpie next class. My other school will be starting these next week. 

Completed painting.

This and the following photos are after using the Percolator App.


Student work in progress.

Tuesday, January 21, 2014

Picasso's Blue Portraits

I am starting a new project with my second graders soon. I decided to use a presentation App on my iPad called Flowboard to introduce the lesson. Here is the intro, and I will post about the project once we get started. Here's the link to the Picasso Flowboard.


View on Flowboard - Presentation and Storytelling Platform for iPad

CREDIT: The portrait template on the last slide was created by Tricia Fuglestad. I received it when I purchased the eBook for her Master Class at Education Closet.

Saturday, November 23, 2013

iPads in the Art Room

I am extremely excited tonight. This morning I learned that a grant I wrote for six iPads was approved by the Education Foundation of Hudson. This fabulous foundation consists of Hudson alumni and accepts proposals up to $3,000 twice a year. They also funded document cameras for each of the elementary art classrooms a couple of years ago. I feel so fortunate to work in a district that not only supports teachers, but also the arts! 


Last summer I took the iPads in the Art Room class through The Art of Ed, and last week I viewed the Creating on iPads Master Class on Education Closet. Both are fabulous resources if you are looking to get started using iPads in your art room. I am glad that I took the AOE class first, as it begins very basic, with setting up the iPad and learning basic features before moving on to finding, sharing, and using apps for projects. I came away with a lot of great ideas, and still have to go through some of the other students' final projects. There were just so many great ideas I haven't gotten to them all. Tricia Fuglestad's presentation on EC was fabulous, but fast. I was glad I have background knowledge on iPads and the video was recorded so I could backtrack and pause when I needed to get everything completely understood. I showed a few fifth graders her portrait project and asked if they would like to do it. At first they declared there was no way they could possibly draw like that-then I showed them a quick demo of the process and they got very excited and asked if we could do it next! I already have a project planned, and have to get Sketchbook X on all the iPads (and hopefully obtain my new ones!) before we can start that project, but I am encouraged by their enthusiasm and am optimistic about the art they will create on their personal iPads after learning how to use the layers feature. With the addition of six iPads from the grant, I will now have eight iPads designated just for my art department, so look forward to more exploration of using iPads in the art room on One Crayola Short!

Friday, November 1, 2013

Phantasy Zebras


My second graders are about 2/3 of the way through this project. I will post the how-to drawing guide I used with them on Monday, as it's saved on a work drive that I don't have access to from home. (Here it is!) So far, they used the drawing tutorial to draw the head of a zebra after looking closely at photographs of zebras to notice details about their faces. We talked about the shape of their noses, how wide their head gets around their eyes, and that their heads get more narrow above their eyes. We looked at the shape of their ears, and even their Mohawks before starting our drawings. I love using drawing tutorials with a presentation remote for many reasons. First, selfishly, I don't have to draw it six times. More importantly, however are the benefits for the kids. I can be out with them, checking their progress and giving tips instead of being stuck near the board. Also, I had a kid absent and I was able to keep the rest of the class on task and give her the remote to work at her own pace. She not only caught up to the rest of the class (because she didn't have to wait on me at all), but her zebra looks stellar!

Once they were done drawing their zebras, I showed them how to distinguish between chisel tip, fine tip, and extra fine tip Sharpies. My sub called them "Daddy, Momma, and Baby, " which the kids had fun with. I even heard some role playing with markers. "I love you Momma, I'm going to use you on these stripes!" I gave them tips on when to use each size marker and how to color thoroughly without looking scribbly and set them to work. 

The next class period, we finished up the Sharpie and then used watercolors for the background. I asked them to go around the zebra head using rainbow order. We reviewed primary and secondary colors and talked about how when the colors go in rainbow order they mix to form the intermediate colors.

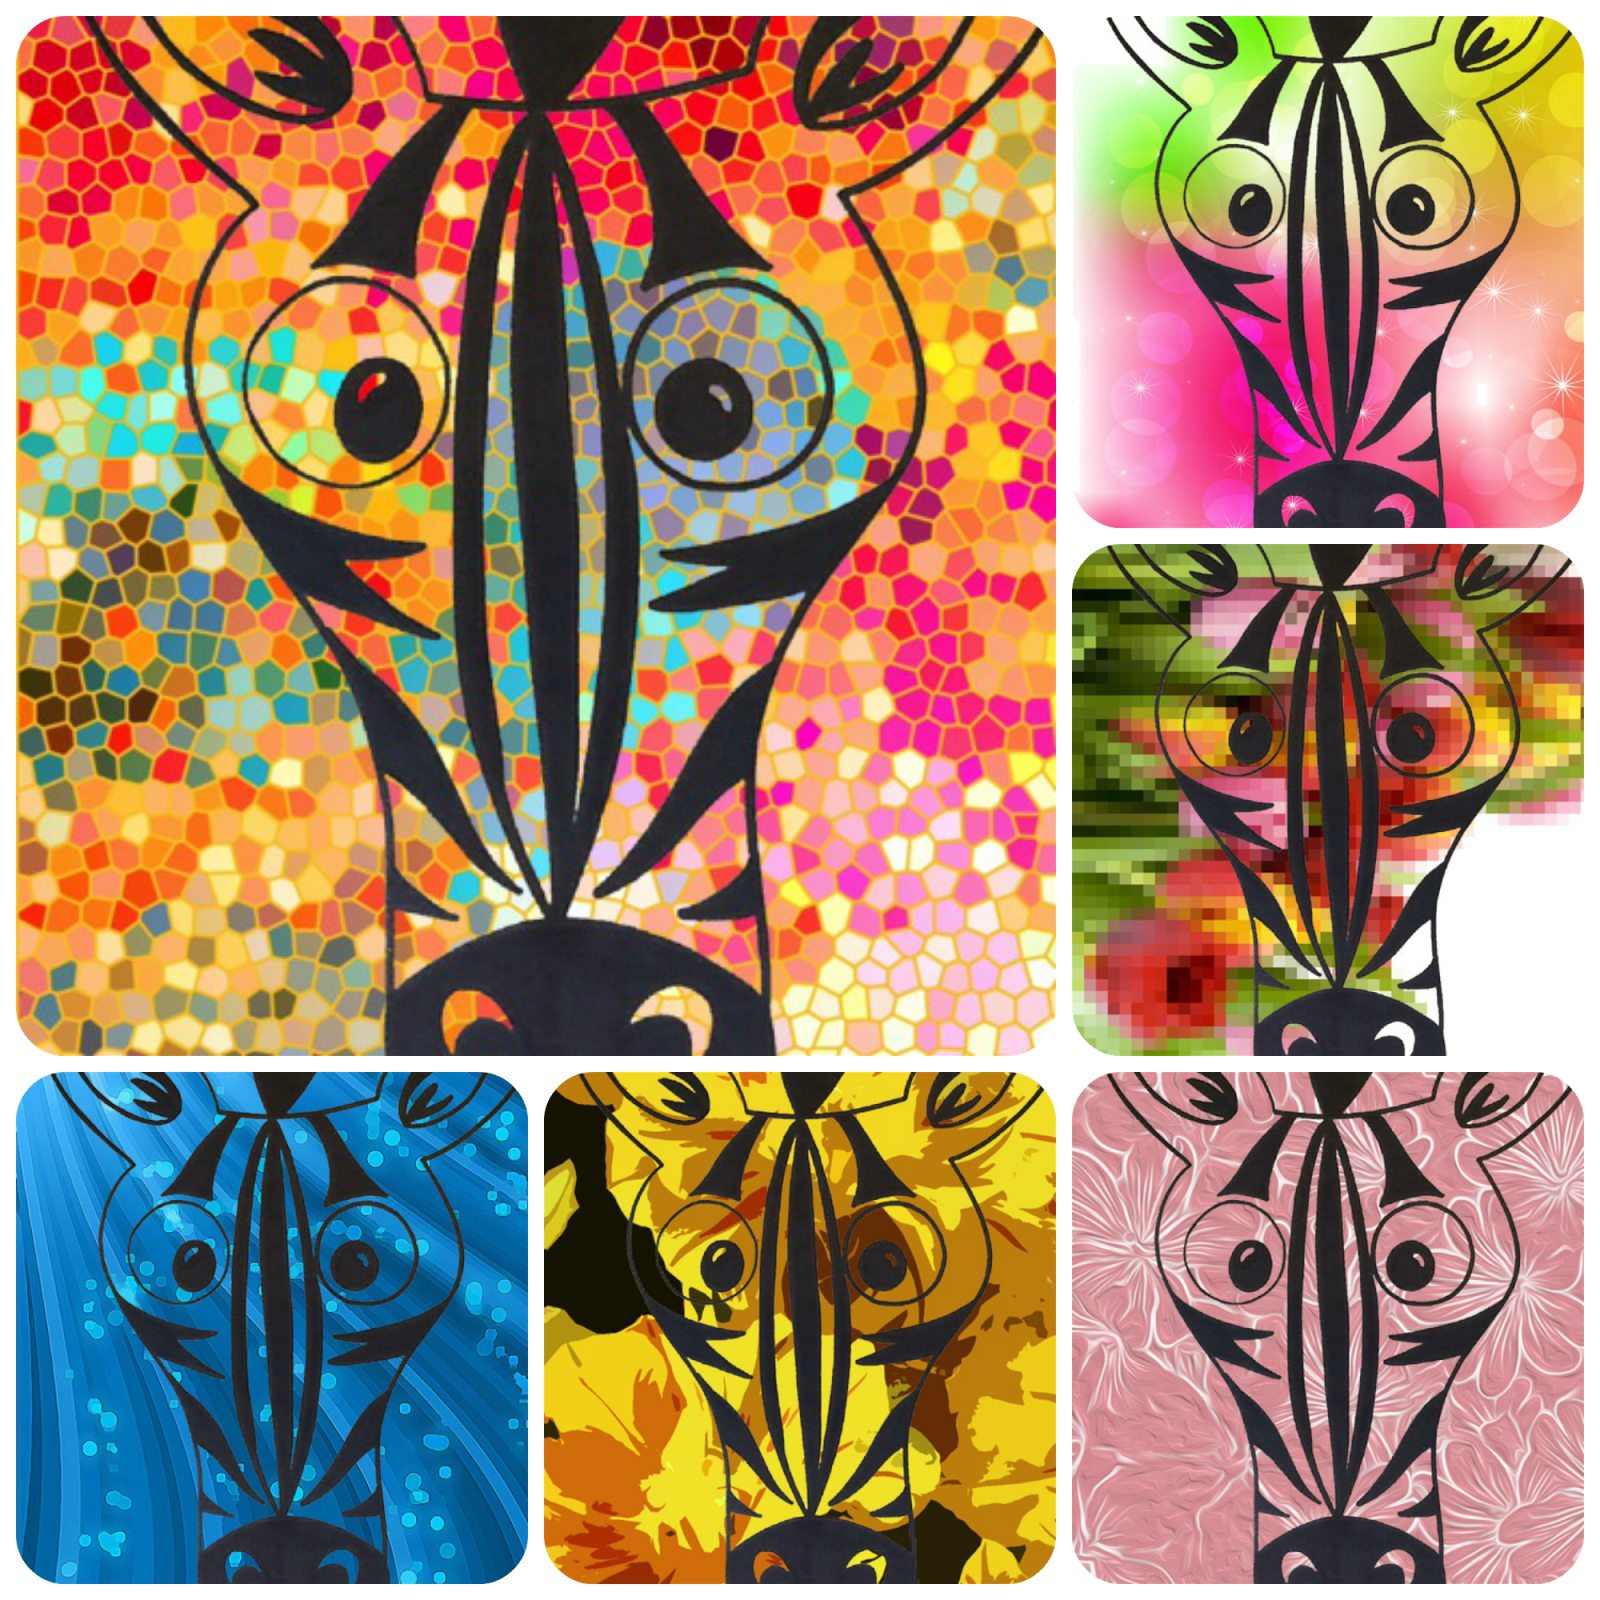
Next cycle, I will be borrowing iPads and having the students manipulate the image they drew and painted. They will use the Phantasy App, which changes the background of the image into something new. There are many images to choose from. Here are just a few examples using my sample zebra. 


Kindergarten on the iPads


I braved using the iPads with kindergartners to start the Percolator Gumball Machine project today. I feel so fortunate that my colleagues were willing to let me borrow their iPads for the day! I will be doing this again with kinders twice next week, and starting with second grade next week as well. If anyone has an easier way of doing all this, please let me know. Here's what I did. . . 


My colleagues started dropping their iPads off right away in the morning, even though I didn't need them until after lunch. I used that to my advantage, and logged into Dropbox on each of the iPads. I then downloaded one child's artwork (which I had already photographed and put into Dropbox after loading them to Artsonia) to each iPad. I put a Post-It note on each iPad to let me know which child's image was loaded. I even went into Percolator and loaded the child's artwork to the iPad. After my demo, all the kid had to do was turn it on and start manipulating the image. 


I had one more iPad than I needed for the kids (it's a small grade level), so I used that to project on the SmartBoard and show the students how to change the different parts of the image. I then set them to work and as they finished I showed them how to save it to their camera roll and keep working. Most kids had more than one image saved-one even had eleven!


When the kids left, I went into each iPad individually and uploaded the images to my Dropbox. I changed the name of the image to the artist's class code followed by their name so that when the computer reorganized the photos the whole class would be together. Next, I logged out of Dropbox on the iPad and deleted all my students' work because they are not my iPads. If anyone knows of a way to change the image file name on the iPad, I am all ears as that would have been a huge time saver today (and even more so next week, when I'm doing more than one grade level!).


When I had all the images transferred, I was able to download them in one large group and load them to Artsonia. I love putting iPad artwork on Artsonia. Not only is it impressive looking, but it's so easy with no editing needed!


These images are all from the same class. I am thrilled with the variety of results and debating about making photo collages like the one at the top of this post to load to each kid's Artsonia account. It would be a fun triptych, but lots of work.


Tuesday, October 22, 2013

Name Fish


I haven't done this project for a couple of years, and with a sub coming in this week Thursday and Friday so I can go to the Wisconsin Art Education Association Fall Conference and again on Tuesday because my district has a fine arts expert coming in to teach us how to write effective SLOs, I decided I needed a tried and true lesson that the kids enjoy. I like to have video intro/demos, especially when I have subs so I feel like I'm there even when I'm not-our counselor jokes that I'm working myself out of a job. I designed this video to be paused after drawing the basic fish and again after adding their names with bubble letters. I'm hoping it will make my subs' lives easier. I also had a student request that I put my videos on YouTube so she can do the projects at home! How convenient that one of the WAEA sessions I am attending is for flipped classrooms! Here's the video I created using PhotoStory3 and Camtasia with music from Soundzabound.


Thursday, October 17, 2013

Pop Art, Pointillism, and the iPad

Pop Art & Pointillism Kindergarten Unit

by Wayne Thiebaud
My kindergartners are finishing up their Pop Art Gumball Machine a la Wayne Thiebaud this cycle. They used printmaking to create the gumballs and collaged it all together. I really wanted to use the Percolator app with them but needed to find a way to link our Pop Art work with Percolator. I decided this is the perfect opportunity to introduce the concept of types of art and specifically Pop Art and Pointillism. I found this great gumball machine worksheet on Mandy's Tips 4 Teachers and printed them out so they could get right to painting after my intro. 

Next, I created a video, as I will be having a sub coming in to teach this to two of my classes while I am off at Art Ed Conferences. This video took me for.ev.er to make. So I'm sharing it here so that all of you can enjoy the fruit of my labor without the intensive work! 

When they are done with their Pointillist Gumball Machines, I will be borrowing the school iPads to use Percolator with them. I am already taking photos of all the work for Artsonia, so I will load those in folders according to class in my dropbox account. This will make them available on the iPads. I will have to spend my lunch break loading each iPad to an individual image as I'm sure my kinders aren't ready for that, but Percolator is pretty easy to use, so once the images are on there I'll give a quick demo on the SmartBoard and let them get to work. I'll have to circulate around the room sending the completed images back to my dropbox. I'll be sure to post when we're done and let you know what I learned about using iPads with kindergartners!

Printmaking & Collage

Pointillism
Technology