
Elementary Art Lesson Plans, Tips, and Tricks
Friday, April 30, 2010
Donations
After spending so much time coming up with recycled art projects for Houlton's Art Show, I've been feeling a little bit inspired to use everyday object in my classroom more often. This takes a lot of planning though, so I thought I'd get a jump on next year. I sent out this list of items to all of the children in my school. I have been getting bags of supplies everyday since I sent the letter out! My empty and nearly empty shelves are filling up, and I am getting new inspirations daily. I thought that you may enjoy having a copy of the list so you too can start collecting.
Thursday, April 29, 2010
Completed Clay Samples
 After counting out the days that I have left with each of my fifth grade classes, I realized I'd better get moving on clay! One class started these Big Mouths this week (they will be missing two art classes due to various events), and I am very excited about their creativity. One girl is making a "crabapple." It has angry looking eyes, a stem, and leaf. It's completely adorable!
 I think the clay ladybug turned out exceptionally cute! I used watercolors to paint the bug. I had to use many layers to get a dark color. The spots are Sharpie, as I thought the watercolor would bleed too much and frustrate the students.
 Rear view, with wax paper wings.
 A few of my first graders saw this owl as I was putting it on the shelf, and asked who gets to make them. They were almost jumping up and down with excitement when I said "You!"
Wednesday, April 28, 2010
Owl Marker Paintings
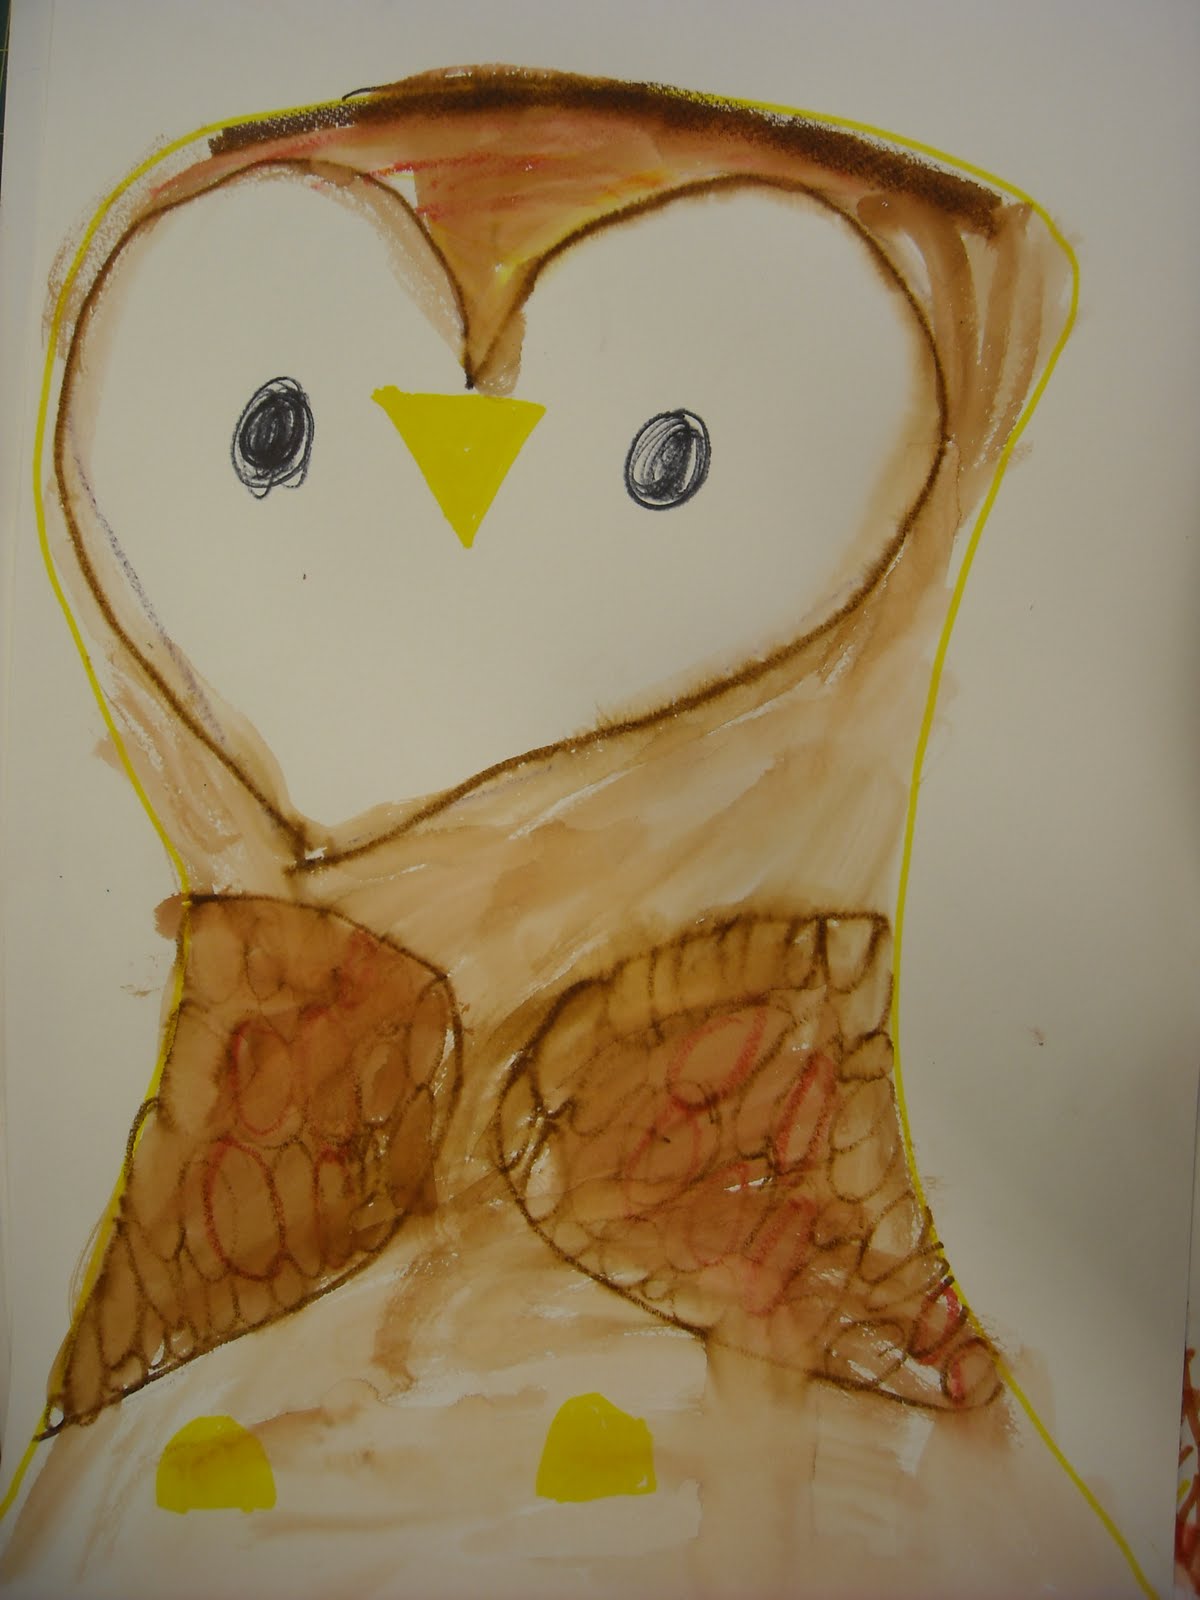
As the end of the year approaches, I am having supply troubles. As in, I don't have many. This is my first year at this district, and when I was doing my order I didn't realize how junky some of the supplies I inherited were. My Temperas are transparent, my watercolors are disgusting, and my markers are wearing out. So I had to get a little creative, and that's a good thing! These Owl Marker Paintings came out of necessity. I started this lesson with my kindergarten students by looking at three varieties of owls and comparing their features. We looked at their eyes, colors, and general shape and then we got to work.

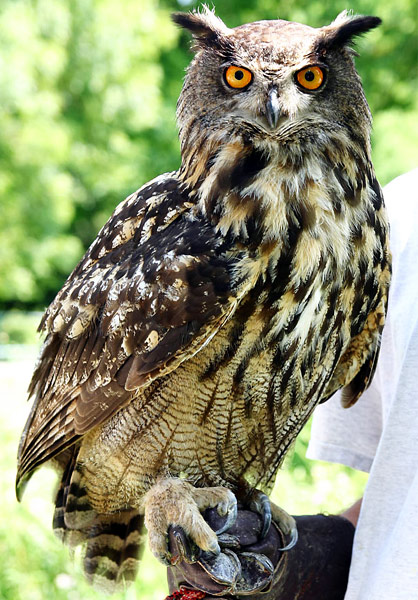

Students got to choose between a Barred Owl, Great Horned Owl, or Barn Owl. I found that the Barn Owls turned out the best, so far. Although, to be fair, only one class is finished and they are my most challenging kindergarteners. Within my Smart Notebook file, I created a step-by-step of how to make each of the three owls. First students used permanent markers to create the eyes, beak, and feet for their bird.
 Next, they used Crayola markers in brown, red, and/or yellow to create the bird's head and body. Finally, they used paintbrushes and water over all of the Crayola marker to make it bleed and look like watercolors. We were able to finish the whole process in one 45 minute class.


Tuesday, April 27, 2010
Houlton Art Show
The First Annual Houlton Art & Music Show will be this Thursday! We have a recycling theme this year. I have almost all of the artwork up, so I grabbed the camera (before it all gets knocked down!)


Kindergarten Louise Nevelson Assemblage projects.
First graders created flowerpots out of the insides of floppy discs.


Second grade used mixed media to create lions in the jungle, ala Henri Rousseau. These are displayed across from the first graders' flowerpots.

Third grade used pebbles to create a mosaic of a tree.

This photo shows third, fourth, and fifth grade projects. I will be moving to table farther down for the actual show. We're using it to block kids from the pebble mosaics because they are across the hall from curious kindergarteners.
 Fourth grade magazine bowls.
 Fifth grade CD Mobiles. I haven't figured out how I'm going to photo these for Artsonia yet!

 Fourth grade magazine bowls.
 Fifth grade CD Mobiles. I haven't figured out how I'm going to photo these for Artsonia yet!
Friday, April 23, 2010
Clay Ladybugs
I was racking my brain for a second grade clay project. I have often done clay fish plaques, and dried them over a bowl to make them into candy dishes but I can't do that this year. Not only have the second graders done a couple of projects using fish, but I don't have any glazes at this school, and wouldn't want them eating out of a watercolored dish. I thought little bugs would be cute, but wanted to know more about bug anatomy before attacking this project. After Googling "bug anatomy," I found this image of Ladybug anatomy that produced an idea.
 I started with three balls of clay, large, medium, and small.
 Made the large one into a pinch pot for the ladybug's body.
Then I made the medium one into a pinch pot and cut it in half for the elytra. I only attached them at the front of the bigger pinch pot.

Repeat with the other side of the cut pinch pot. Then make the smallest ball of clay into an oval shape and attach it under the joint of the elytra.

After the children paint these with watercolors, I plan on having them make wings out of wax paper to glue between the body and elytra. Wiggle eyes and wire will complete our little sculptures. I hope they turn out as cute as they are in my head!

Clay Owls
 I saw an adorable clay plaque of an owl by an elementary schooler once, but couldn't quite remember how it looked, so I Googled "clay owl," and found the white image on the left. I thought it was a great little owl, and am hoping that my first graders have a good time making them next week. Here's how I approached the project:
I started with a ball of clay about the size of my palm when rolled into a ball.
 Flattened it.
Used a marker cap to create a feathery texture where the bird's belly will be (this also works great for scales when making fish).

I smoothed out the edge of the clay and folded it towards the center to create the first wing.

Repeat on the other side for the second wing, smooth out the top and fold it down for the head.

Pinch the clay to make the "horns" if you want to make a traditional, Great Horned Owl.

The marker cap was used again to create the eyes, and a clay tool for the beak.

Then I trimmed the bottom of my owl, smoothed it out, and found a sea shell.

I used the sea shell to create a cute texture on the wings.

Once fired, I plan on having the children paint these with watercolors, and then I will add little wire feet on the bottoms. I also put a hole in the back so they can be hung on the wall when finished.
Big Mouths
I have spent a lot of time today getting ready for clay projects. I have only done clay with kindergarten and third grade, and we only have five more art classes! Here's what I'm planning for fifth grade; I found the project originally on Artsonia and made a "mental note" to come back to the gallery to more carefully examine the projects. However, I forgot to bookmark it and couldn't find it when I wanted to go back and view them. So, I used my imagination and came up with my own version. Last year, I had the kids look at charatures before creating these, and they turned out great. I'm at a new district now, and we have shorter classes so I'm not sure if I will be making that connection. I do plan on making a Smart Notebook presentation of them, just in case.
 I started with a ball of clay about the size of a raquetball-almost as big as my palm. I pushed the handle of a paintbrush into it and made it into a pinchpot.

Two equal sized balls create the eyes.
 I scored them, added slip, and smoothed them together (I call those my "Three Ss" for the kids to easily remember them). I used a marker cap to press the eyes into the clay. As I played with the nose, it started to look way too much like Elmo (curse of having a two-year-old?), so I used a clay tool to make nostrils instead. Then it looked like a frog to me, so I went with it by adding a long tongue.
He's after lunch, so I added a little bee/fly for him by rolling an oblong ball and pinching wings.

We will be painting these with watercolors, and adding details such as beads, feathers, wire, etc with hot glue.
Here is a completed example:

Subscribe to:
Posts (Atom)