Showing posts with label Watercolor. Show all posts

Friday, September 26, 2014

Kindergarten Kandinsky Paintings

To begin our tour of Asia, my Kindergartners looked at art by Wassily Kandinsky. They learned what a concentric shape is, and that it can be any shape inside of each other. They then learned what my expectations are for painting in the art room, and we got started. 

Every year, I am completely amazed by the differences in my Kindergartners. Some have never held a pair of scissors. One year I even had one that had never held a pencil! So it's not surprising that these all turned out so different from each other. I love the variety, and it was very informative to watch them paint.


 I prefolded the paper for them so that each paper had eight squares. I demonstrated how to "tickle" the paper with the tip of the paint brush to get a nice line and asked the children to fill each square with as many circles as they could fit.


 They are so fun displayed in our atrium!


Thursday, November 11, 2010

TR Mack

I found the artist, Tom McCracken of TR Mack Studios through a fellow art education blogger, Ms. Malone. I love his work of vibrant trees and villages that have many dots painted throughout. I was saddened to read that he died in March, 2010 so his Esty page is "on vacation." I plan on emailing his family that left the note on his Esty account and asking if they are planning on making a page devoted to his work and life. My students have really enjoyed looking at his work and are very curious about his life! We have just started his project, but they are all excited about it, and all the other grades that are coming in start class with "who gets to make those trees?!"

After looking at a sampling of TR Mack's paintings and prints, students use analagous colors to create a watercolor wash over the whole paper. I asked them to work the paint until they got rid of the lines and the colors flowed from one to another. Some did great at this, and some did well~but overall I was quite impressed!


The next class period we talked about how to draw a tree successfully. We looked again at TR Mack's examples and I showed them how you can find the letter Y in the branches, and there are never more thantwo branches at any split. I also showed them how to curve the branches if they wanted to make a tree with spiral branchs. Once the trees were drawn, I showed the kids how to use the tip of a flat brush to create a crisp line. They had predicted that we would use markers for the trees because my examples had such crisp lines! I expected the trees to take one class, but they are less than halfway done with them so next class will be finishing up the trees. Finally, they will use different sized dowels to print the circles in the background and between the tree branches.


Here is my in-progress and completed examples of this project. I can't wait to see them finished!

Thanks, Ms. Malone for the heads up on a wonderful artist!

Thursday, April 29, 2010

Completed Clay Samples

After counting out the days that I have left with each of my fifth grade classes, I realized I'd better get moving on clay! One class started these Big Mouths this week (they will be missing two art classes due to various events), and I am very excited about their creativity. One girl is making a "crabapple." It has angry looking eyes, a stem, and leaf. It's completely adorable!

I think the clay ladybug turned out exceptionally cute! I used watercolors to paint the bug. I had to use many layers to get a dark color. The spots are Sharpie, as I thought the watercolor would bleed too much and frustrate the students.

Rear view, with wax paper wings.


A few of my first graders saw this owl as I was putting it on the shelf, and asked who gets to make them. They were almost jumping up and down with excitement when I said "You!"


Monday, January 25, 2010

Wolf Kahn Trees


LEARNING TARGETS:
-Recognize a landscape.
-Experience masking.
-Experience wet-on-wet watercolor technique.

TERMS:
-Wolf Kahn: A living artist that paints primarily landscape paintings.
-Landscape: An image of outside.
-Masking: Blocking off a portion of the paper/canvas and painting over it to leave the area the original color.
-Wet-on-wet: Applying wet paint to wet paper by applying water to the paper first.

MATERIALS:
12" X 18" Watercolor paper
Rolls of painter's tape for each table
Scissors
Watercolor paints
Paint brushes
Water containers/Water
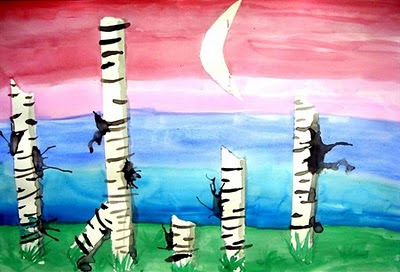

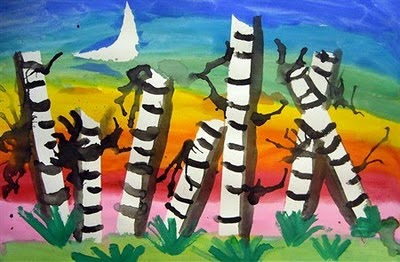
After talking about Landscapes and Wolf Kahn, viewing a slideshow of each we started the project. Students were asked to first put down at least 5 strips of painter's tape, near the bottom of the page. Next, they put pieces of tape together by overlapping them to create a larger piece of adhesive and cut out a moon. When all pieces needed are masked off, the painting begins! Start with the ground, because when the sky is added it will draw the water upwards, making the horizon line look like grass/bushes. I encouraged my students to use not only green, but also yellow and brown in the ground. When the ground is complete, cover the rest of the paper with plain water. Add stripes of color, which should blend into each other on the wet paper. If the paint is not blending, there is not enough water. Students can even lift the paper in different directions to make the paint run.
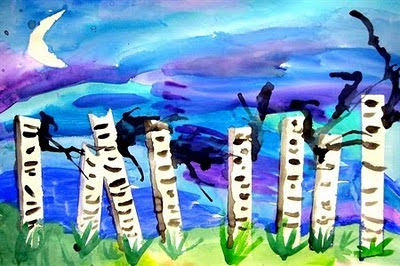

When the sky is dry, the teacher should remove the masked areas to reveal the white paper beneath. Next class, students should be taught additional watercolor techniques to complete the details of the painting. First, they should add the clumps of grass, pressing the brush down at the base of the grass, and lifting it as the blade gets higher. This will cause the brushstroke to get thinner. Next, we talked about the moon being a light source and that a shadow is the absence of light. The kids reasoned that if a shadow is the absence of light, it should be on the side of the tree opposite the moon! I showed them how to use a lot of water and a little bit of black paint to create a gray shadow. TROUBLESHOOTING: if the shadow is too dark, add more water and spread the paint out. If it is already spread out, add more water and dab with a paper towel. Curved black lines should be added along the trees; some longer than others. Finally, the last step is to add a watery dab of paint to the side of a tree and use a straw to blow the paint to look like branches.
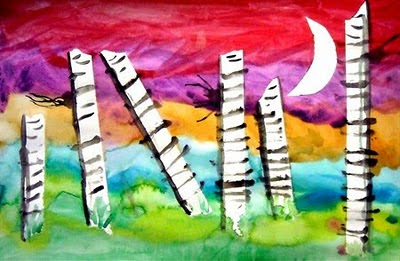

ASSESSMENT: While the kids are painting the sky, be sure to circulate the room making sure students are comprehending the wet-on-wet technique. Many will need to be encouraged to use more water and some will forget to use it at all! Completed works of art should be assessed for completion of all steps and craftsmanship.