Showing posts with label Radial Design. Show all posts

Saturday, October 10, 2015

Moroccan Mosaics


My third graders just completed these Moroccan Mosaics. We looked at an example on the SmartBoard and I drew lines of symmetry to show how the pattern rotates. Next, each student got a precut and primed piece of cardboard-I just cut up cereal boxes and was able to get four from each box (two from each large panel). I showed them how to lightly draw lines of symmetry and glue one precut foamie in the first quadrant. I asked them to rotate the cardboard and put the next foamie in the exact same spot. After repeating that with the final quadrants they could move on to the next color, leaving a tiny bit of the white showing to represent the grout lines. I asked the kids to stick to squares or triangles and showed them how to create a triangle by cutting the square from corner to corner. Many of the results are stunning!


I actually did a similar project many years ago, as a new teacher. Instead of using Moroccan Mosaics as inspiration they just did a flower and we used unprimed cardboard. They used small bottles of puffy paint between the foamies to represent the grout. I liked the results of that, but it took about three times as much puffy paint as I thought it would. It became a pain to run to the store almost nightly for more white puffy paint! 

Monday, December 5, 2011

TP Roll Snowflakes~Part I

Usually my Adapted Art lessons are "one and done" type of projects. The kids like to take them with them as soon as possible, and I like to accommodate. However, today we are starting a two part project recycling TP rolls into snowflakes that look quilled. Here's step one.

Students should write their name on the inside of a piece or TP roll
(I cut them about 1/2 each).

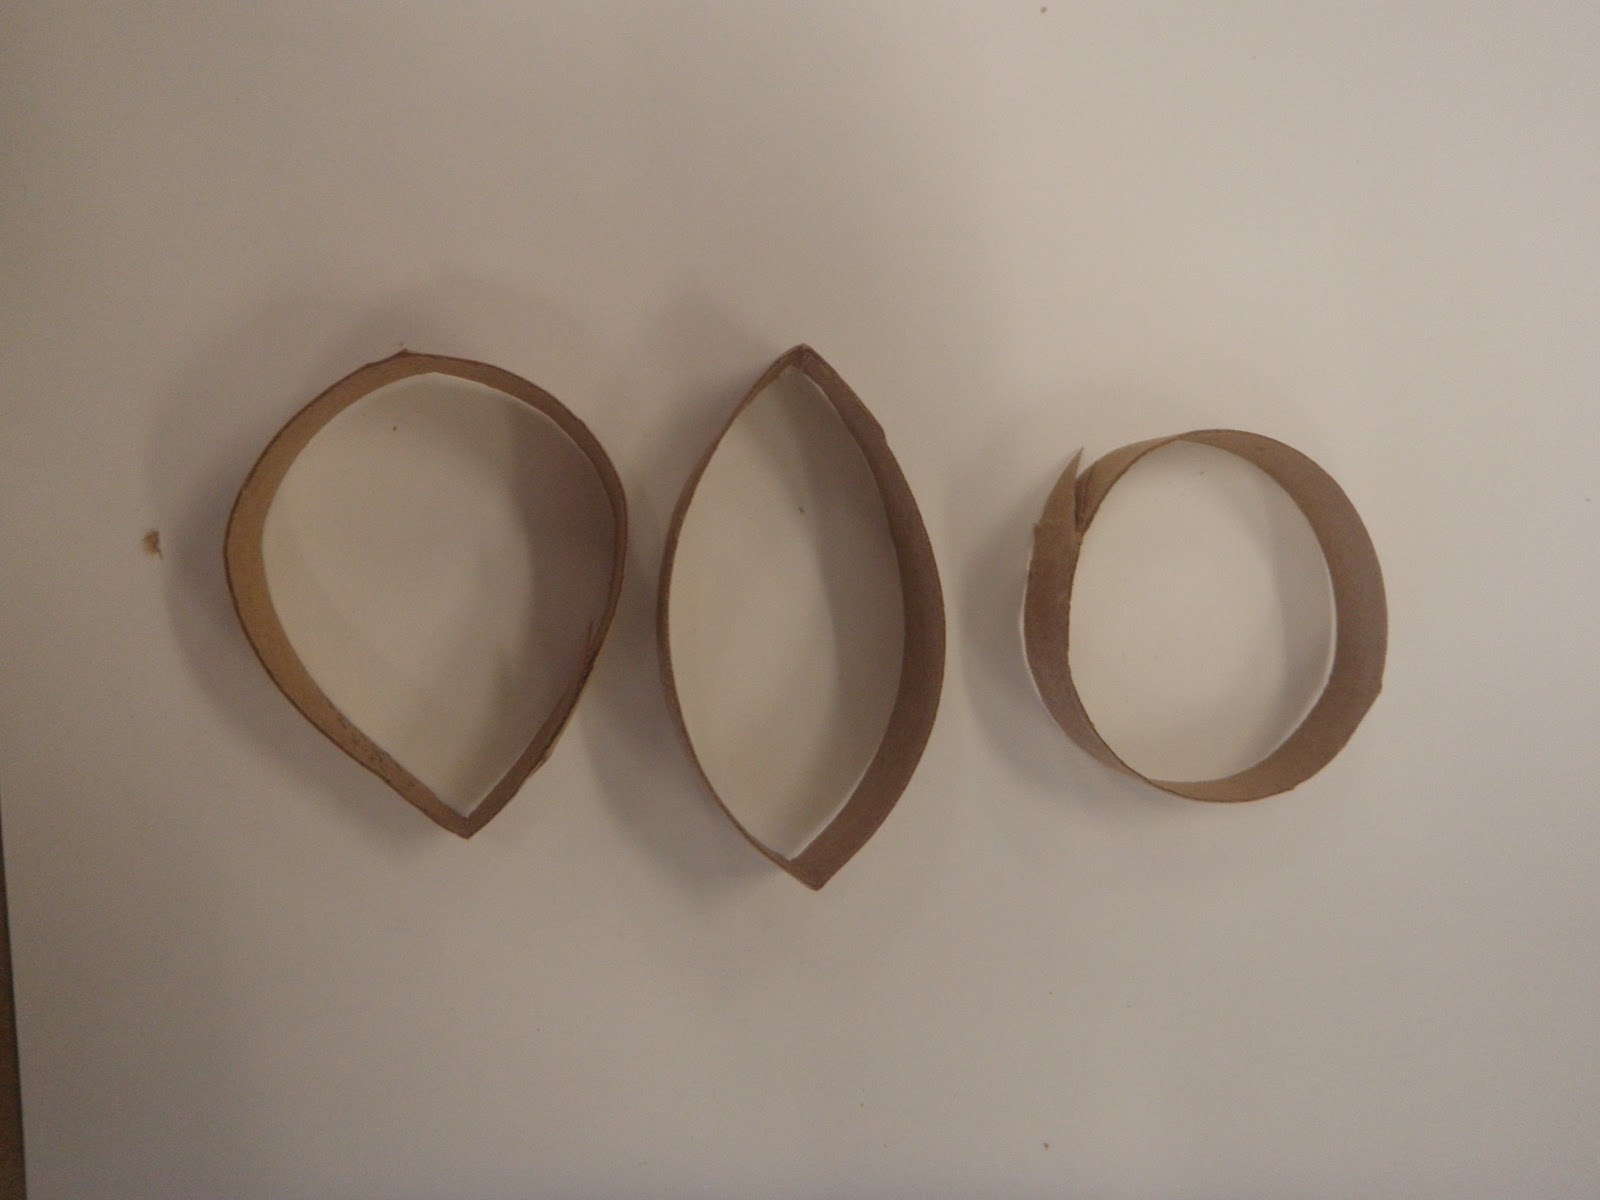
2. They can make three different shapes from the TP strips;
keep it round, pinch one side, or pinch both sides.

3. Put a drop of glue on the shape they've created.

4. Press the glued spot to the piece with their name on it.

5. Add a paperclip to hold it for them so they can keep working.

6. Add their next piece, gluing it to the center and the first piece that was glued.

7. Paperclip all the glue spots.

8. Continue until they have made a whole snowflake.


 OPTIONAL: Add spirals
UPDATE: Unless you plan on spray painting them, or leaving them their original color I'd recommend skipping the spirals. Brushing on paint causes them to become too wet and straighten out.


1. Cut a circle into a strip.

2. Roll the strip around a pencil.

3. Hold it on the pencil for a moment.

4. Glue it to the snowflake and add a paperclip to hold it on.

5. End of step one!


Click here for our project inspiration.

Saturday, March 20, 2010

Embossed Rose Windows

LEARNING TARGETS:
-Demonstrate understanding of radial design.
-Experience using a design sheet to plan the project out.

TERMS:
-Radial Design:A pattern that repeats in a circular pattern, working its way from the center of the circle to the outer edge.
-Symmetry: The image is the same on both sides; such as a mirror image.
-Embossed: The method of pressing metal to create raised and lowered aspects in the work of art.
-Rose Windows: Circular stained glass windows most commonly found in cathedrals.


MATERIALS:
Metal Tooling
Tooling Tools
Newspaper
Sharpie or other Permanent Markers
Scissors
Glue
Black Paper, 8"X8"
Design Sheets (Circle drawn with eight equal triangles)
Pencils
Colored Pencils (optional)

We began by looking at a PowerPoint with many examples of Rose Windows. We talked about radial design and symmetry. I pointed out that the windows vary in how elaborate they are. Next, students were asked to create a pattern on a design sheet. I told them if they didn't like their first idea, try something different in the next triangle. They could use as many design sheets as needed, but their final sheet should have at least three triangles in a row of the design they like so they can see how the shapes flow from one triangle to the next. I asked them to plan out their colors with colored pencils on their design sheets as well. The permenant markers won't come off the metal, so I wanted them to have an idea of their color goals before they got to that step.


When their design sheet is complete, they were given a piece of metal tooling and shown how to place their design sheet on top of the tooling, with a thick pile of newspaper under the metal. A tooling tool (sharpened stick) was used to trace over the circle and the straight lines that made up the triangles within the circle. Next, I asked them to cut out the triangle that they thought they drew the best. That triangle was taped to the metal and traced. Then it was moved to the next triangle and traced again. They repeated this step until all eight triangles are traced onto the metal, completing their radial design.


Now the fun begins! I showed the students how to use the back of the stick to press the metal until the shape is popping out. I stressed that they must have a thick pile of newspaper under the metal, or it wouldn't work properly. I also asked them to pop the same shape(s) out on every triangle.


Finally, when they are satisfied with their embossing, studesnts should color their project with permanent markers. Last, they cut their circles out and glued them to a piece of black construction paper. When displayed together, this project is very eye catching!

Saturday, December 26, 2009

The Dot

I have found that first graders are very conscious of the craftsmanship of their art. Many get hard on themselves for not being able to do a project as "good" as my samples, to which I remind them that I have been practicing much longer than they have and if they keep practicing they will keep improving. To help them gain confidence at the beginning of the year, I start with this pointillism project. It's great because it teaches them to try new things, art history (George Seurat), and a new art technique (pointillism).

LEARNING TARGETS:
~Use dots to create a successful work of art.
~Understand that artists use dots to create an image (pointillism).

MATERIALS:
10" X 10" white tissue paper
12" X 12" colored paper
Markers
Newspaper
Sponges and water
Glue (for mounting finished pieces)
TERMS:
Pointillism: Technique of using dots to create an image.
Symmetry/Symmetrical: The same on both sides; a mirror image.


We start by reading The Dot by Peter Reynolds, about a girl that didn't think she was good at art. Her art teacher told her to "make a dot and see where it takes you." By the end of the book, she has her own art show! We talk about the importance of trying new things and practicing-I stress that "practice makes better"- not necessarily perfect.


Next, I show the students my examples and tell them that it's not as hard as it looks and if they pay attention to the instructions, they will have a wonderful work of art. Next, I demonstrate the project. First, they fold a 10" X 10" piece of white tissue paper in half twice to create a smaller square. Using a sponge with the tissue on top of a piece of newspaper they should get the tissue wet, so they can see through it but not have a puddle on it.


Finally, they use markers and only dots to create a pattern on the smaller square. I stress that if they want a line they have to make the line with dots, not by drawing a line. I demonstrate how to make shapes with dots instead of drawing them. Lastly, they bring their papers up to me to open them up. I lay them on the newspaper with the artist's name on it until it is dry and then mount them on 12" X 12" colored paper.


ASSESSMENT: In addition to circulating the classroom, watching for comprehension and guiding students to find success, I assess the completed works of art for the use of dots, craftsmanship, and creativity. When assessing for the use of dots, remember that the water can sometimes blend the dots together; especially if the student didn't finish in one class period and had to re-wet the project the following class.