Showing posts with label Element of Design: Shape. Show all posts

Friday, January 15, 2016

Egyptian Collars

First graders looked at Ancient Egyptian collars. They noticed that the collars are symmetrical. We talked about color theory and focused on analogous colors. Students chose four analogous colors to work with and either made two of their shape or made their shape symmetrical. 

I made a template of the collar shape and pre traced them all on the back of the gold paper. I got a roll of gold paper from School Specialty but in hindsight, it was a thin as wrapping paper and if I do this again I'd just wait and buy gold wrapping paper after Christmas and save some money. The kids cut the shape out and then folded their paper in half. 


I show them how to glue one symmetrical shape on the fold to make the whole collar symmetrical. We talked about using two identical shapes to create symmetry and I showed them how to glue a shape on one side and match the second shape to the first. They added a bit of glue on top of the second shape and then folded their collar to make it transfer to the other side. 

When finished, students chose a color that fit with their analogous color group for the background paper.

Friday, November 13, 2015

Anansi the Spider; An Ashanti Folktale


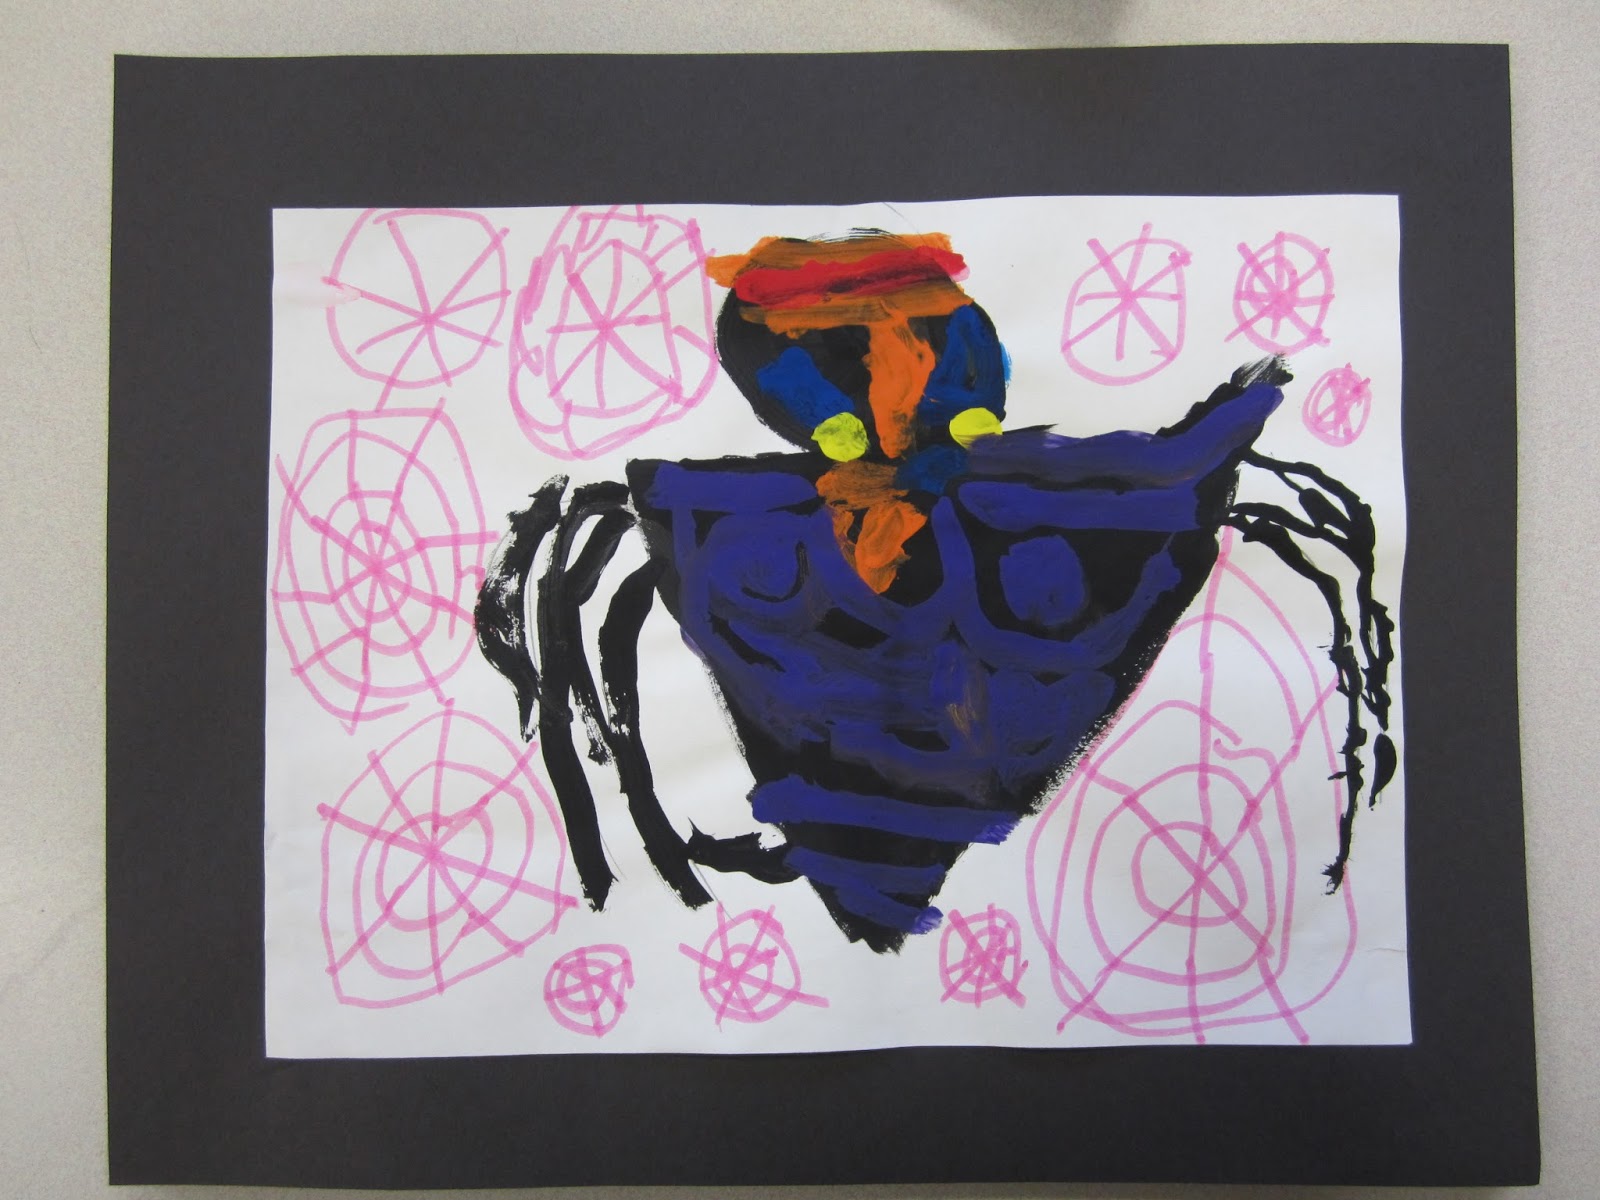
My kindergartners just finished painting these cute Anansi spiders. Anansi is the an Ashanti folkstory from Ghana, Africa. I began this lesson by reading the book to the kids. Anansi has six sons, who each have a special talent. There is See Trouble, Road Builder, River Drinker, Game Skinner, Stone Thrower, and Cushion. Each son has a different shape on his body to show his talent. When Anansi gets into trouble the sons use their talents to save his life. 


After reading the story, students were given pencils and white paper. I used guided drawing on the SmartBoard to show them how to draw a triangle (they insisted it's upside down) with an oval on top for the head. I asked them to show me on their fingers how many legs a spider has. They all showed me five on one hand and three on the other so I asked them to add one to the three and subtract the thumb on the hand with five. I showed them with my hands that I now had four fingers up on both hands and that's how a spider's legs are arranged on their body. I showed them how Anansi's legs overlap and asked them to draw four legs on each side. 
While they were finishing up their drawings I passed out pallets of black paint, but no brushes yet. I then demonstrated how to use the edge of a flat brush to make a smooth line around the shape before filling in the insides. They had the option of using the same flat brush for the legs or using a detail brush. I showed them tricks for both brushes. Finally, I gave them brushes and asked them to paint in their drawings. 


The next class period we looked at a picture of Anansi on the SmartBoard and talked about the web behind him. It is created with pattern instead of traditional spiderwebs. I showed them how to make both a patterned web like the book or a traditional web and let them decide how to fill in the background with marker. Finally, I gave them pallets with red, orange, yellow, blue, and purple and used my document camera to walk them through painting the face and other details on their spider. We started with orange and painted a V for the lower lip and a triangle like the body for the top lip. Then it was a T for the nose and bottom of the headband with a strip a little above it. Next, we skipped to blue and painted the triangles above the eyes and the nostrils. Yellow was next for the eyes and then a red stripe on the headband. Last, we talked about and looked at the images of the six sons and noticed the different shapes on the bodies. They used purple to add any shape on their spider's body. 


Monday, December 5, 2011

TP Roll Snowflakes~Part I

Usually my Adapted Art lessons are "one and done" type of projects. The kids like to take them with them as soon as possible, and I like to accommodate. However, today we are starting a two part project recycling TP rolls into snowflakes that look quilled. Here's step one.

Students should write their name on the inside of a piece or TP roll
(I cut them about 1/2 each).

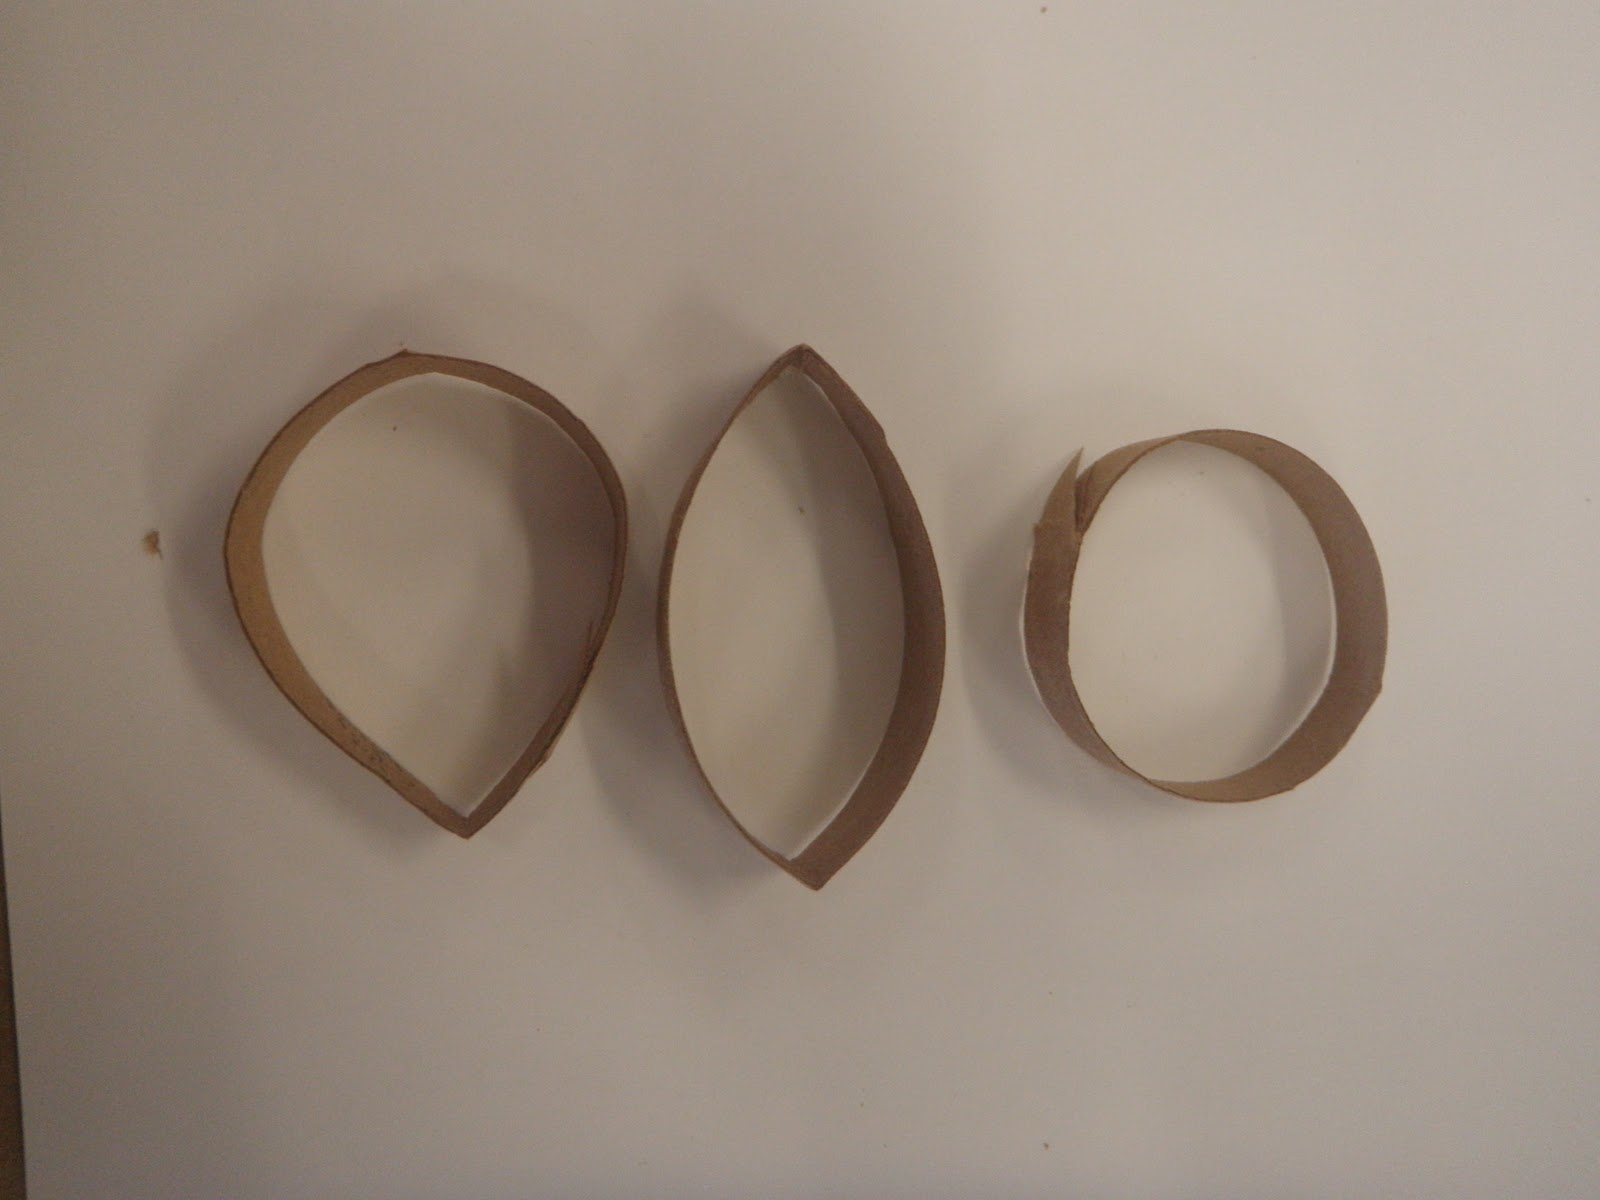
2. They can make three different shapes from the TP strips;
keep it round, pinch one side, or pinch both sides.

3. Put a drop of glue on the shape they've created.

4. Press the glued spot to the piece with their name on it.

5. Add a paperclip to hold it for them so they can keep working.

6. Add their next piece, gluing it to the center and the first piece that was glued.

7. Paperclip all the glue spots.

8. Continue until they have made a whole snowflake.


 OPTIONAL: Add spirals
UPDATE: Unless you plan on spray painting them, or leaving them their original color I'd recommend skipping the spirals. Brushing on paint causes them to become too wet and straighten out.


1. Cut a circle into a strip.

2. Roll the strip around a pencil.

3. Hold it on the pencil for a moment.

4. Glue it to the snowflake and add a paperclip to hold it on.

5. End of step one!


Click here for our project inspiration.

Thursday, November 11, 2010

TR Mack

I found the artist, Tom McCracken of TR Mack Studios through a fellow art education blogger, Ms. Malone. I love his work of vibrant trees and villages that have many dots painted throughout. I was saddened to read that he died in March, 2010 so his Esty page is "on vacation." I plan on emailing his family that left the note on his Esty account and asking if they are planning on making a page devoted to his work and life. My students have really enjoyed looking at his work and are very curious about his life! We have just started his project, but they are all excited about it, and all the other grades that are coming in start class with "who gets to make those trees?!"

After looking at a sampling of TR Mack's paintings and prints, students use analagous colors to create a watercolor wash over the whole paper. I asked them to work the paint until they got rid of the lines and the colors flowed from one to another. Some did great at this, and some did well~but overall I was quite impressed!


The next class period we talked about how to draw a tree successfully. We looked again at TR Mack's examples and I showed them how you can find the letter Y in the branches, and there are never more thantwo branches at any split. I also showed them how to curve the branches if they wanted to make a tree with spiral branchs. Once the trees were drawn, I showed the kids how to use the tip of a flat brush to create a crisp line. They had predicted that we would use markers for the trees because my examples had such crisp lines! I expected the trees to take one class, but they are less than halfway done with them so next class will be finishing up the trees. Finally, they will use different sized dowels to print the circles in the background and between the tree branches.


Here is my in-progress and completed examples of this project. I can't wait to see them finished!

Thanks, Ms. Malone for the heads up on a wonderful artist!

Saturday, March 20, 2010

Mexican Tin Lizards

LEARNING TARGETS:
-Use a design sheet to plan out the project.
-Create a successful work of art using knowledge gain about Mexican Tin Art and Folk Art.

TERMS:
-Mexican Tin Art: A type of art created by artists from Mexico which involves embossing metal to create a work of art. Works are often enhanced with enamel, jewels, mirror or tiles.
-Folk Art: Art that is specific to its culture and is most often used as decoration.


MATERIALS:
Design Sheets
Pencils
Foamcore Board
X-acto Knife (teacher use)
Printmaking Foam
Scissors
Glue
Aluminum Foil
Erasers-either new pencils or cap erasers
Sharpies or other Permanent Markers
Metal Tooling
Stapler/Staples
Masking Tape
Twisteez Wire (optional)


I got the concept for this project from Denise Logan's Dynamic Art Projects for Children. If you haven't checked out this book, I strongly recommend it; the projects are outstanding, as you can tell by this example! We started with a PowerPoint of examples of Mexican Tin Art. They are easy to find through Google. Students talked about the use of color, and aspects that were embossed. Next, I gave them a design sheet of the basic lizard shape and asked them to design how they want their lizard to look. I gave them ideas, such as using symmetry, or shapes down the center of the lizard's back. I stressed keeping it simple. Too often, my students have gotten too complicated with their design stage. I also asked them to color their lizard so they would begin thinking about what they will be doing with color before they get to that step.


With the design sheet completed, students were asked to transfer their design onto the lizard body;which I cut out for them prior to class. They then trace their lines with black Sharpie to make them dark. This allowed them to be able to see their shapes through the printmaking foam. Once their shapes were traced onto the printmaking foam, they were cut out and glued to the lizard body in the correct spots. I showed students that they could put two layers of printmaking foam to create different levels of "embossing" on their lizard. With all the shapes in place, I showed them how to put glue on a piece of alumunium foil, spread it out, and wrap it around their lizard. I encouraged them not to be overly concerned about minor tears as they will be covered with the marker.


The next step was to color the lizard with permanent markers. I reminded them not to forget the sides of the lizard body. We cut feet out of metal tooling and stapled and taped them to the underside of the lizard body. Neither staples or tape are strong enough on their own. NOTE: these could easily be kept as snakes by leaving the legs off. I gave students the option of adding a tongue by attaching a piece of wire the same way as the legs. These are getting rave reviews!


Embossed Rose Windows

LEARNING TARGETS:
-Demonstrate understanding of radial design.
-Experience using a design sheet to plan the project out.

TERMS:
-Radial Design:A pattern that repeats in a circular pattern, working its way from the center of the circle to the outer edge.
-Symmetry: The image is the same on both sides; such as a mirror image.
-Embossed: The method of pressing metal to create raised and lowered aspects in the work of art.
-Rose Windows: Circular stained glass windows most commonly found in cathedrals.


MATERIALS:
Metal Tooling
Tooling Tools
Newspaper
Sharpie or other Permanent Markers
Scissors
Glue
Black Paper, 8"X8"
Design Sheets (Circle drawn with eight equal triangles)
Pencils
Colored Pencils (optional)

We began by looking at a PowerPoint with many examples of Rose Windows. We talked about radial design and symmetry. I pointed out that the windows vary in how elaborate they are. Next, students were asked to create a pattern on a design sheet. I told them if they didn't like their first idea, try something different in the next triangle. They could use as many design sheets as needed, but their final sheet should have at least three triangles in a row of the design they like so they can see how the shapes flow from one triangle to the next. I asked them to plan out their colors with colored pencils on their design sheets as well. The permenant markers won't come off the metal, so I wanted them to have an idea of their color goals before they got to that step.


When their design sheet is complete, they were given a piece of metal tooling and shown how to place their design sheet on top of the tooling, with a thick pile of newspaper under the metal. A tooling tool (sharpened stick) was used to trace over the circle and the straight lines that made up the triangles within the circle. Next, I asked them to cut out the triangle that they thought they drew the best. That triangle was taped to the metal and traced. Then it was moved to the next triangle and traced again. They repeated this step until all eight triangles are traced onto the metal, completing their radial design.


Now the fun begins! I showed the students how to use the back of the stick to press the metal until the shape is popping out. I stressed that they must have a thick pile of newspaper under the metal, or it wouldn't work properly. I also asked them to pop the same shape(s) out on every triangle.


Finally, when they are satisfied with their embossing, studesnts should color their project with permanent markers. Last, they cut their circles out and glued them to a piece of black construction paper. When displayed together, this project is very eye catching!