Wednesday, December 14, 2011
Favorite Classroom Tips
1. Use wipes to clean the tables. I'm sure landfills everywhere disagree, but using wipes is amazing! It easily cleans off even dried paint, and the kids are so excited to use them. I tell them I will pass out a wipe or two to each table after all the stuff on the table is put away. They rush to get it all put away so they can come up and get a wipe. No more lakes on my tables! As an added bonus, the whole room smells fresh and clean after 20+ kids use a baby or Chlorox wipe on their table spot.
2. Use a magazine as a pallet. SERIOUSLY?! Brilliant! Simply rip off the top page and toss when the kids are done painting with it. Viola. Done and done. I hate cleaning pallets so much, I almost shouted out loud when I read that idea! And to think, all the new supply catalogs are coming out right now. A perfect way to recycle outdated or multiple catalogs!
Monday, December 5, 2011
TP Roll Snowflakes~Part I
UPDATE: Unless you plan on spray painting them, or leaving them their original color I'd recommend skipping the spirals. Brushing on paint causes them to become too wet and straighten out.
Thursday, November 17, 2011
Kumihimo Weaving
Wednesday, October 26, 2011
Adirondack Alcohol Inks
First, spread the blending solution on the tile. This will disperse the ink and lighten it so the color is visible instead of being so condensed that it looks almost black regardless of the color.
Loving it! I'm thinking of putting a board of these up over the windows in my classroom. It would be spectacular (and the kids wouldn't be able to reach them!).
Sunday, October 16, 2011
The Truth Hurts
Wednesday, October 5, 2011
Neglect
1. I got a new classroom! I'm super excited about it, and loving it~but arranging it and organizing it took up ALL of my inservice time before school started and I still have not caught up with all the work that needs to be done. Now instead of having a room in the middle of the school with no windows (it used to be the stage area when the school was a high school), I have a beautiful room with windows all along on side. Although it's a little smaller, the natural light more than makes up for it.
2. Half of my department retired last year and I have been helping out my new colleagues so they will get a great start on their new careers with our district.
3. I had a baby! Our little boy, Jerry Richard, was born June 24th, so he is three months old now. I pump before lunch, leaving me with only about a half hour to clean up after one class, eat, and get stuff out for my three afternoon classes.
Tuesday, October 4, 2011
Recycled Gargoyles~Guest Post!
 Wow, another guest post, what fun! This one is written by Elaine Hirsch, who works with Lindsey from my last guest post. Elaine Hirsch is kind of a jack-of-all-interests, from education and history to medicine and videogames. This makes it difficult to choose just one life path, so she is currently working as a writer for various education-related sites and writing about all these things instead. Currently, she is a writer for an online PhD programs website.She has written about how to create gargoyle from cardboard cup holders. We're hoping to add some photos of the process, so check back for that!
 Gargoyles from Coffee Trays
Teachers often drink a lot of coffee in order to keep up with students, and often one will go out and get a bunch of coffee for their coworkers, often bringing them back with a carry-out tray. Don't throw these out- collecting coffee trays is the first step towards a fun and educational gargoyle project. Not only does this give students an opportunity to see how entertaining recycling can be, but they will learn how easy and beneficial it is, as well as learn a bit about classical architecture.
Before you get started, a great way to get students excited during their brief gargoyle history lesson is to give them a crash course on the importance of gargoyles in Europe and to show them pictures of several different gargoyles around the world. Gargoyles date back to ancient times. The name comes from the Latin word, gurgulio, meaning to swallow or throat. Kids will recognize the other modern word derived from this root, gurgling! Gargoyles were originally used as rainspouts on buildings, to shunt rainwater off the roof and away from the foundation. They often depicted a frightening face, supposedly to ward off evil spirits. Today, they are more often used as decorative elements on buildings and tombstones, or as Halloween decorations.
Materials:
Scissors
Cardboard (5x5 in squares)
Lots of Carry Out Coffee Trays
Egg cartons
Masking tape
Paper pulp
Glue
Sand
Brown and Gray paint
Paint brushes
Prep:
1. Make some paper pulp! First, soak shredded newspaper in water and stir. Then strain it, and add 1 cup of white glue to strained paper. It's best to do this shortly before class if you can so that it doesn't dry out beforehand.
2. Cut most of your coffee trays in half- these are to be the eyes. Make sure to leave enough trays to cut into quarters for mouths. Say if you have 20 students, save 10 trays for eyes, and 5 for mouths. Egg crates can be cut any way and used for horns.
3. The flat cardboard is to be used as the base of the gargoyle. Kids will write their names on the back.
Instructions
1. Take the half piece and bend it in the middle so that it curves out. The curve will be the nose, the indents the eyes. Tape it down to the cardboard with lots of masking tape, but don't tape the bottom down yet.
When students get creative recycling everyday objects, they can soon see caterpillars and boats and bird feeders out of milk cartons and pizzaboxes. The possible projects are endless. This could also be a good time to teach them about what items are recyclable and which aren't. It's fun and worth the effort!
Wednesday, August 3, 2011
Guest Post
Thanks, Lindsey!
45-Minute Digital Art Lessons are Inexpensive and Beneficial for Young Students
With the rise of computers and mobile devices in all aspects of our daily lives, many artists are putting down the paintbrushes and oil paints and turning to digital platforms to express their creative ideas. Since professional artists are moving to digital media, it's no surprise that the youngest artists among us are following suit. As digital art software becomes less expensive, easier to use, and more widely available, children can also join the ranks of digital artists. There are many free or low-cost options online for teachers to choose from for traditional or online courses, and all students can benefit from learning digital art techniques.
Digital art software programs vary greatly. Some programs, such as iDoodle2 lite and DoodleIt are available for the iPhone and other mobile devices. These programs generally have fewer features than those meant for a full-size computer. They also might be more difficult for smaller fingers to use. Other programs, such as the free Inkscape and Gimp work best on a full-size computer. Both programs are similar to the expensive professional software used by graphic designers, and both offer considerable functionality and control. For very young or beginning students, Microsoft Paint or any similar program already on your computer may be sufficient to gauge the child's interest level before downloading a more extensive program.
The most important technique for encouraging artistic expression in a young student is to make each lesson fun and fairly brief. Young children shouldn't begin with hours-long lessons. Longer classes could wear the students out and tax their shorter attention spans. 45-minute lessons are perfectly timed for young students. By maintaining a short but interesting lesson, instructors can help younger students retain their original enthusiasm and creativity. Art remains something enjoyable rather than becoming a chore or just another subject to be studied.
Many parents report that the creative outlet helps their children learn to express themselves in safe, nurturing ways. According to one study, art plays a key role in cognitive and social development in children. Often, by working on an art project young students are able to work through the basic personal and social problems that occur in their lives. The art provides an outlet for new or difficult emotions. In addition to mental, social, and emotional benefits that children and young students gain from expressing their creativity, there are also physical advantages. Especially in young children, digital art lessons hone hand-eye coordination and teach muscle control.
With the decline of arts programs in schools, many parents feel that they need to take matters into their own hands. Less than 10% of arts funding comes from the government, and in addition, the New York Times reported that corporate art funding declined to less than half of its 1994 rate by 2004. With these dismal prospects, it's no wonder parents are working to encourage a love of art in their children at home, and digital art is the perfect solution. It requires no specialized, expensive, or bulky supplies, and rather than purchasing and providing messy paints, brushes, markers, paper, and other supplies, parents can encourage the artistic talents in their children with less expenditure of time and energy as well as money. Digital art requires little setup for a bout of intensive creativity. Simply turn the computer on, open the software program, and the young student is ready to create.
Young students should begin with simple projects that teach them the functions of their chosen software while still encouraging creativity. Add different skills slowly and methodically in order to keep students interested. Each new lesson should teach only one or two new functions. Some options for younger students include using a shape-drawing function to create different sizes of each shape (squares, circles, etc.) or using paintbrush or pen functions to draw simple figures such as flowers and trees. Older students can combine these functions to create a simple landscape. Animals and human figures should be reserved for later lessons, as they often prove very difficult for young students to create digitally without practice and familiarity with the particular software. For older students, free lesson plans are available at The Virtual Instructor.
Young students may enjoy enhancing existing images or photos as well as creating their own images and paintings from scratch. Capture your students' interests by providing them with a well-known photo and allowing them to color, stretch, crop, and otherwise enhance the image. Family photos, maps, and even scans of newsprint can all create excellent bases for a young student's creativity. You can encourage students' hand-eye coordination and use of color by providing a black-and-white photo and allowing them to color in the sections. Being provided with a familiar starting point can be less daunting to young students than facing a blank canvas and beginning the entire project on their own.
Whether a young child is a budding Picasso or simply enjoys the creative process for its own sake, he or she can benefit from art instruction. In addition to being a enjoyable and inexpensive hobby for young students, digital art helps them to develop life skills that they will use forever. The creative, social, and cognitive benefits to a developing mind cannot be easily overestimated.
Monday, August 1, 2011
Crayon Artist
Friday, June 10, 2011
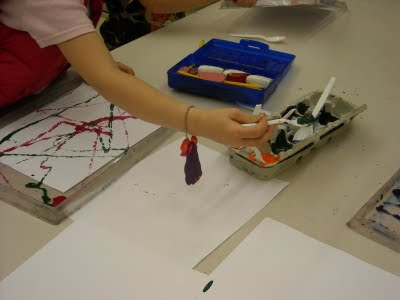
Marble Painting
Monday, June 6, 2011
Pour Paintings-Results
Tuesday, May 24, 2011
Pour Paintings
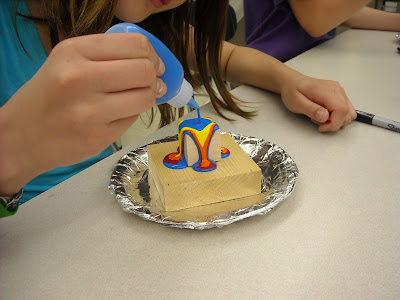 One of my fifth grades tried Holton Rower's Pour Paintings today. I'm hoping that they will dry ok. I'm a little nervous that they will crack a lot, but it's all about the process, right?! We did our mini-using small wooden cubes and some makeup containers that were donated. Students hot glued them together and put them on a plate covered with foil so I'll be able to remove the plate later. I loved how amazed they were by the video. Then I heard a lot of "that's so easy!" I reminded them to pour consistently and as close to the middle as they could. They definately figured out it is not as easy as it looks!
Monday, May 23, 2011
Clay Birds
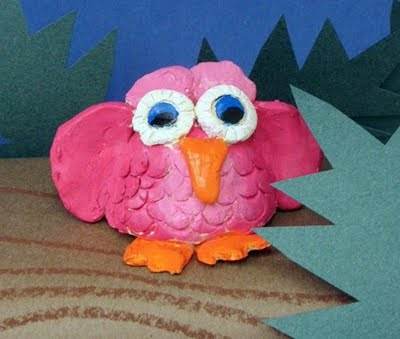
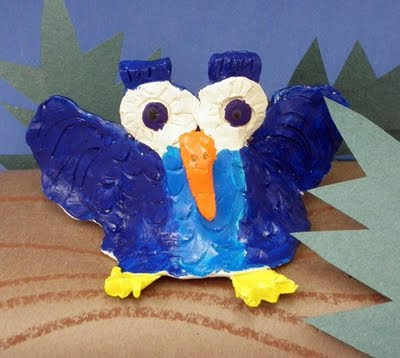
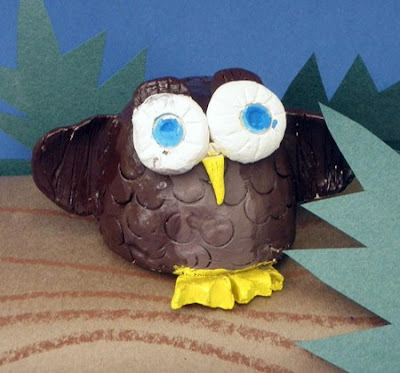 Throughout the creation process we were referring to these as their "owls," and some kids didn't want to deviate from the original concept when it came to painting time and asked for brown or black paint instead of the bright rainbow colors I had already poured. I could understanding wanting to stick with the idea in their heads, so I got the other colors out. They turned out great.
Kindergarten Monoprints
Thursday, May 19, 2011
Spray Bottle Paintings
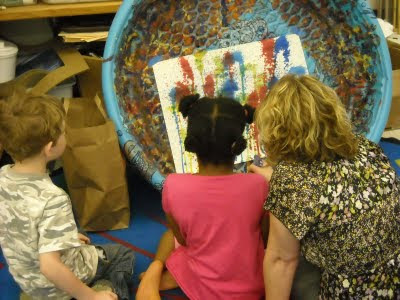 Dontcha just love it when you plan a project thinking "Yeah, they'll probably like this. I think." and they love it. Not just love it, but create many, many copies of the project? I especially love it when that happens with my adapted art classes. So many of my objectives with those classes are to help the children grow in areas they are just fine at not growing in, thank you very much. Stretching themselves is especially hard for these kids, so many of my lessons are greeted with resistance. Today, however all but one kid created multiples of the project! Even my most severe young student picked up a spray bottle and started her own second project! She usually waits for her classmates to be done with their project so she can go back to class. It was so rewarding to watch these kids flourish today. Seriously, I'm kinda on a little high from it. All we did was use spray bottles of red, yellow, and blue liquid watercolors to spray large pieces of paper. I had three stations set up that I thought would be easy to clean up (ha!). One on my white board (easy-ish, once I remembered to move the markers!), one in my trusty kiddie pool (super easy!) and one on a wall that I taped large paper over (not easy at all! Make sure the paper goes all the way to the floor! I'm gonna have to bleach my wall. Oops.) We taped paper to the station, handed the child a bottle of each color and let them go to town. I'll post the results later, as they aren't dry yet. Beautiful, vibrant colors.
Press Here
Silk Hoops
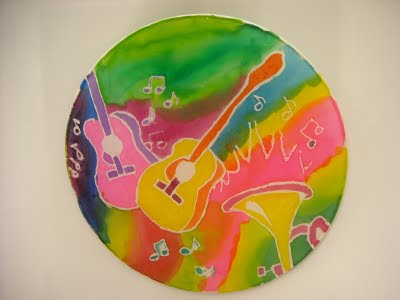
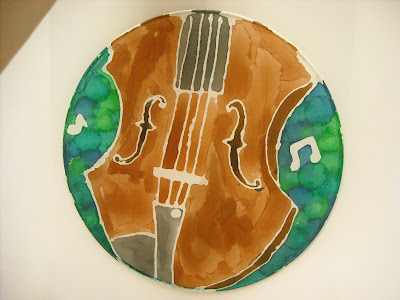
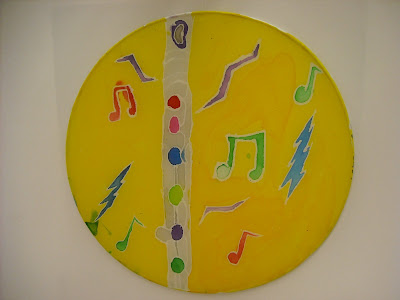
I love this project. Honestly, the hardest part about it is deciding on subject matter. Everything turns out great. I've done under the sea, jungle, radial imagery, and now music. We went with music this year to go along with our Young Author's Day, which is tomorrow and a big deal around here. The kids wrote books that are displayed in the Media Center, and will be doing workshops with professionals throughout the day tomorrow. These are hanging in the windows of the Media Center, which also over look the Atrium.
