Friday, October 16, 2015

Moroccan Khamsas


Second graders are finishing up their Moroccan Khamsas. Students learned about Morocco and we talked about their largest religion, Islam. The Khamsa, or Hand of Fatima is a symbol of protection in their religion. Students then learned how to use a ruler to create an even border by matching it with the edge of the paper and drawing on the other side of the ruler. They traced their thumb, index, middle, and ring fingers of one hand and then worked with a partner to trace their thumb of their other hand to create a full Khamsa shape. 


Next, students learned about the Element of Art: Color by focusing on warm and cool colors. We played a game to measure understanding. I called out a color and if they thought it was a cool color they would wrap their arms around themselves like they were shivering. If they thought it was a warm color they would fan themselves. It worked really well! They chose warm or cool colors for the hand and border and the opposite color group for around the hand. 

When they were done painting they used any extra time to practice some patterns in their sketchbooks. The next class period they used those patterns to finish up the project. They were asked to draw an eye on the hand and fill the hand, the space around the hand, and the border with patterns. 

Saturday, October 10, 2015

Moroccan Tiles


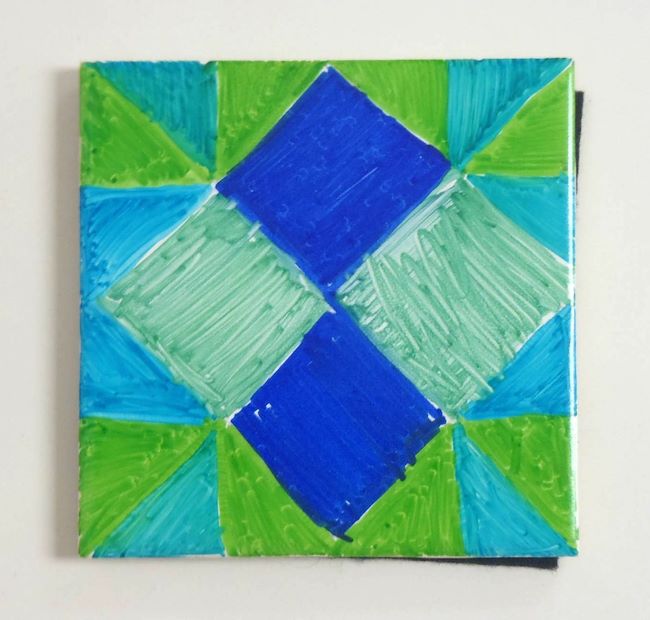
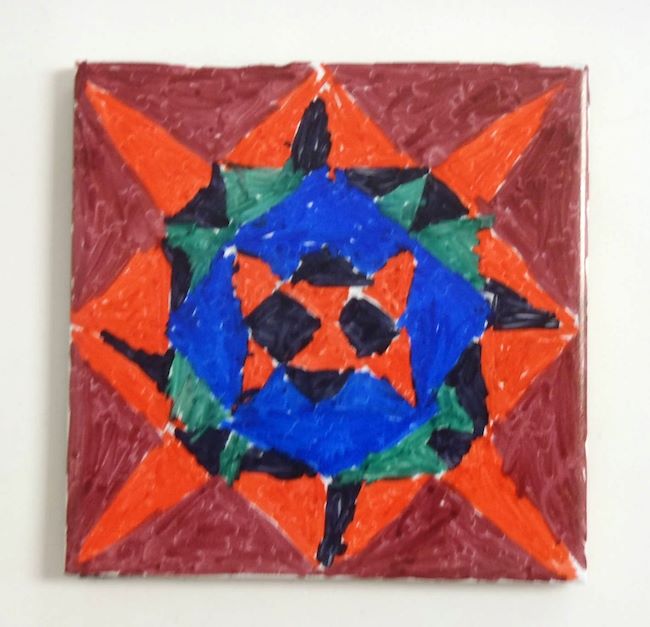
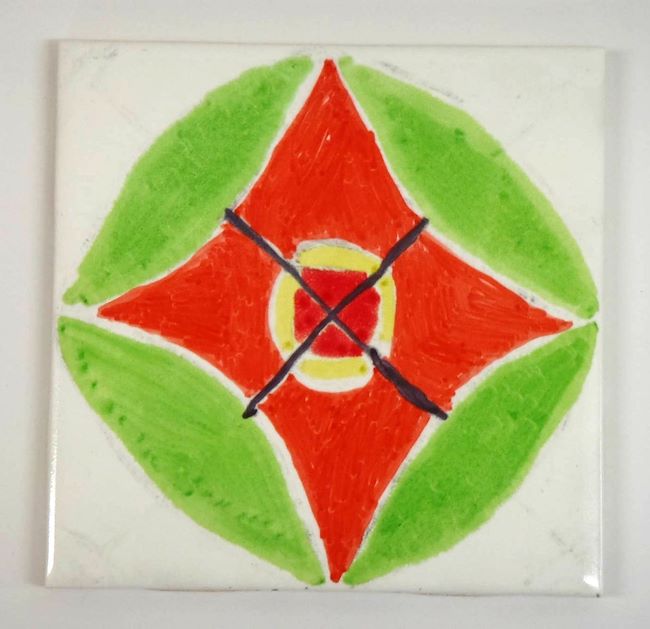
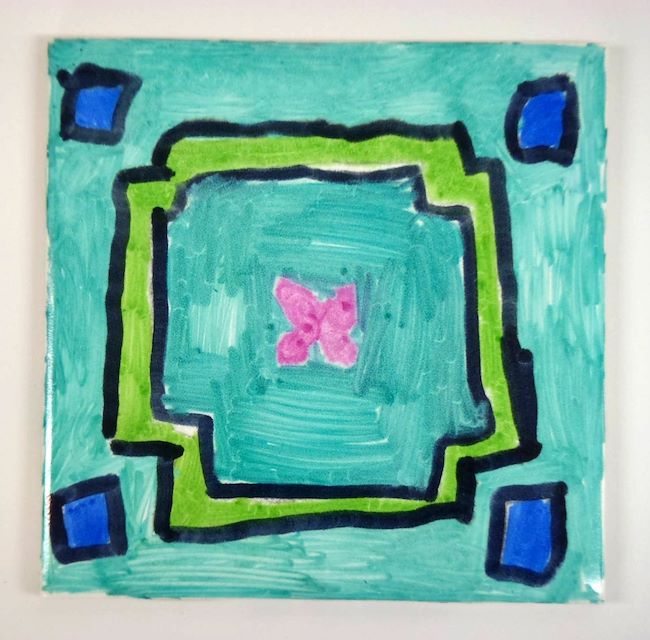
My fourth graders started our African studies in Morocco. They learned about radial symmetry that is found in Moroccan tiles and then created their own radial design using a design sheet. 


Once they were happy with their designs, they were asked to go over their lines again, as dark as they could. 


Their dark designs were then taped to their tile with the pencil side facing the tile. They scribbled on the back of the paper as hard as they could to transfer the image onto the tile. Next, they used Sharpies to color their design.


To finish the tiles, they glued a piece of felt to the bottom of the tile and I sprayed them with spray Mod Podge. I had to be very careful to spray a tiny layer first and let it dry before spraying 2-3 more thin layers. If the layer got too thick, the Sharpie would bleed. 

Moroccan Mosaics


My third graders just completed these Moroccan Mosaics. We looked at an example on the SmartBoard and I drew lines of symmetry to show how the pattern rotates. Next, each student got a precut and primed piece of cardboard-I just cut up cereal boxes and was able to get four from each box (two from each large panel). I showed them how to lightly draw lines of symmetry and glue one precut foamie in the first quadrant. I asked them to rotate the cardboard and put the next foamie in the exact same spot. After repeating that with the final quadrants they could move on to the next color, leaving a tiny bit of the white showing to represent the grout lines. I asked the kids to stick to squares or triangles and showed them how to create a triangle by cutting the square from corner to corner. Many of the results are stunning!


I actually did a similar project many years ago, as a new teacher. Instead of using Moroccan Mosaics as inspiration they just did a flower and we used unprimed cardboard. They used small bottles of puffy paint between the foamies to represent the grout. I liked the results of that, but it took about three times as much puffy paint as I thought it would. It became a pain to run to the store almost nightly for more white puffy paint! 

Mbuti Bark Paintings from DR Congo

Images are all student examples.
I tend to start my Kindergartners off very slowly. The first class I gave them a piece of cardstock with six shapes on it. We talked about the Element of Art: Shape and they named each shape. Next, I taught them how to hold and use a pair of scissors and asked them to cut out all six shapes. They put them in an envelope until next class. The next class, we practiced using little dots of glue on a worksheet with a picture of a glue bottle with dots on it. When the passed the glue "test," they were asked to arrange their shapes into an image and glue them down. They added marker details to complete their picture. This simple lesson lets me assess their cutting, gluing, drawing, and creativity baseline in one activity. Once I have this information, I am able to more easily plan lessons and projects that fit their skills and require them to develop new skills. 

My Kindergartners then learned about the Element of Art: Line by learning about bark paintings from the artisans in DR Congo. I cut a roll of craft paper in half and then cut that into 15" pieces, leaving each student with a piece of brown paper that was 15" X 15". Due to the curl in the rolled paper, I taped the pieces to the table at one school (the Kinders at that school meet right after my lunch break) and to drawing boards at my other school. That was especially fun because I taught them how to lean the boards against the edge of the table to make enough room for four boards at each of the cafeteria style tables. They looked and felt like "real" artists as they painted for the first time. I taught them how to "tickle" the paper with the tip of the brush and never mash the brush in the paint or on the paper. I showed them how to flip the brush to use all the paint on the brush before getting more paint. Students were asked to paint at least three (math connection!!) different types of lines. We talked about what "at least" means and I quizzed them before letting them go on their own with questions like "Could I paint two different kinds of lines? How about six?" until I felt they had a clear grasp of what was expected of them. 

When they filled the paper with lines, they were asked to fill out a paper with three boxes on it, one box for each new type of line. 


Saturday, October 3, 2015

Assessment

I don't know about all of you, but the word assessment makes me cringe. I'm more open to it than I was when I first started teaching, and do find it useful at times but in general miss the time in education when I could just sit and create some fun artwork with my awesome students. However, with the teaching climate the way it is, it is necessary to show that our students are learning-even in art. With 650-700 students depending on enrollment, I had to find a way to easily organize all of these assessments. I used to have half sheets of paper for most projects, but have recently found even easier ways to organize assessment. I went to one of my media specialist and told her I was looking for an app that would allow my students to manipulate images and email the results to me. After looking at a few options, we found the perfect app for this process. PicCollage.
PicCollage allows the user to load as many pictures as desired and layer them as they see fit. I have two assessments currently ready for my students to use. The first one I will use with first graders to show that they learned foreground, middle ground, and background. We are touring Africa this year, and they are working on landscape chalk drawings of the Sahara. They will be putting three items into their landscapes; one in each plane of depth. They can choose from cactus plants, camels, or pyramids. For their PicCollage, I put a picture of sand dunes in first and tapped on "select as background" to lock it into place behind the other images. I then searched for each item, adding "with transparent background" after the name; for example, "camel with transparent background." This allowed me to find images that would fit easily with the picture. Once they were put onto one iPad, they were in the camera roll for all of them and it was just a matter of pre-loading the images I needed. Here's what the image looks like when the kids go into the app: 
They can increase and decrease the image size by pinching and move the items to the foreground, middle ground, and background. We talked about how things in the foreground look larger than things in the background, so they will be able to move them to something like this: 
Here's another one I will be using for third and fourth grade, both of which are learning about radial symmetry of Moroccan mosaics and tiles (more on those later).

Before


After
When complete, students can simply email me their finished image and type their name in the subject line of the email. I can grade them whenever I have time, from any device that has internet!

The other new assessment tool I am using is Google Classroom. I am very new to this, but have been getting my 3rd-5th graders set up on it. I will post on that once we finish our first projects, so I can give some tried and true tips.

Thursday, September 3, 2015

Room Orientation Videos

The Art of Ed recently published an idea about using videos and QR codes to introduce areas of the classroom. I modified this idea and used Tellagami to create videos and the kids are using Aurasma to have them come up on their iPads (one per table, working in groups). They have a worksheet with questions like "where do we put our artwork between classes?" and they have silly answers and one correct one. Here are the videos, which I am showing to K-2 instead of using Aurasma.


Thursday, August 13, 2015

Africa

I am extremely excited to be exploring Africa with my students this year. I have been researching different tribes of some of the countries and have a few things planned out but still have a lot of research ahead of me. 

From DR Congo:
These cloths will make an excellent Kindergarten lesson on line.

Students will have a lot of fun learning about portraiture and 3D artwork with African maskmaking.

Egypt

Lessons about Egypt are plenty! I hope to make clay beetles with Kindergarten, Sarcophagus lessons, and of course a Pharaoh headdress!

Ethiopia
I have an idea of using plastic canvas and yarn to create mini versions of these beautiful baskets. I haven't tried it yet, but my mind is really going on this one!

Kenya
I found this student version of a traditional Kenyan necklace on Pinterest. It's made with cording and embroidery floss, and I think my 4th graders will love it!

Mali
Mudcloth of Mail will make for an amazing printmaking project.


Morocco

Morocco has so many amazing styles of art! I am thinking about a printmaking project using their Islamic patterns by carving into an eraser and repeating the print multiple times.

Namibia
Such gorgeous scenery! Throughout the year I will be teaching about animals that live in Africa that we would never see wild in Wisconsin. I plan on using "Giraffes Can't Dance" to inspire young-1st or 2nd- artists.

 South Africa
I'm still considering what we could do here. Perhaps paper mache spheres in 1st or 2nd grade.

Tanzania
Edward Said Tingatinga is a famous artist from Tanzania that inspired the Disney show, "Tinga Tinga Tales." His artwork will be beautiful with a combination of watercolor and drawing. I actually taught his style to 3rd graders a few years ago using crayon resist and watercolor wash. Most of them turned out amazing.

Saturday, April 4, 2015

Asian Art Study: Russia

I realize that I have posted some of these projects before, but in looking at my schools' Artsonia galleries, I am so proud and happy with the way this year went that I thought I would break up the year into the units of countries that we studied. If you don't already know, I decided to focus my teaching on one continent each year starting this year. I chose Asia to start with and honestly, I think I could have spent all year just in Japan! The curiosity and genuine interests the students have shown in each country has been remarkable. Here is the first country we "flew" to; Russia. 

This was my kinder's second project of the year, and their first time painting with me. They learned about Kandinsky, concentric circles, and watercolor painting techniques along with my painting expectations, and how to clean up in the art room.

After completing their Kandinsky paintings, my kinders used strips and squares of paper to create these Russian tiger collages inspired by an image I found on Pinterest. The full lesson is found here. 
First graders did two projects in Russia. This is their study of landscape and the focus of the lesson was foreground, middle ground, and background. For full instructions to teach this lesson, visit my inspiration here. 
First grade's second project was Babushka (aka Matryoshka) Doll Drawings. We looked at a set of dolls my parents brought me from Russia and noticed how they get smaller, that most of them are holding something and there is a lot of patterns on them. I got out a variety of sizes of bottle caps for them to use to trace the heads and gave them pointers for drawing the details. Students were asked to use at least three different drawing media to color their dolls. The full lesson can be found here.   

Second graders looked at Russian architecture and compared their traditional buildings to what they see in Wisconsin. They noticed the elaborate designs, dome tops, and bright colors. They then drew their own version of a Russian building and were asked to color it with crayons, colored pencils, markers and oil pastels using their "artist brains" to choose the best medium for each portion of their building. They then watercolored the sky.
Third grade looked at the art and life of Russian artist, Marc Chagall. They learned that his paintings are dream like interpretations of stories of his life in Vitbesk. They wrote a story with four parts and then illustrated it using four different perspectives and at least three different drawing supplies. 

Like first grade, fourth grade looked at Babushka Dolls. They created clay versions using two pinch pots and connecting them to make the hollow "peanut" form and then painting them. While the clay versions were drying and being fired the also created a drawing using colored pencils. They were allowed to use the drawing as practice for the sculpture, or to design the two project differently. 


The fifth graders learned about Kazimir Malevich. They looked at the progression of his art from realistic to Cubist to the creation of Suprematism. Next I tried my hand at a modified choice project. I allowed students to either create a Cubist image using oil pastels or a Suprematist collage. Regardless of the media, students were asked to show movement, balance, unity, shape, line, and color in their composition. 

Thursday, February 12, 2015

Youth Art Month

Although Youth Art Month is not until March, our State show was moved to an earlier date, sending our Regional show into February. It works well for me, as the old date used to overlap my daughter's birthday which made it hard to be a good mom and a good art teacher. Here are some pictures of my students' work hung in the Regional show which is held at the WITC in New Richmond through the 19th of this month. 


I decided to give the kids a personal award to recognize their achievement as well. A colleague gave me boxes and boxes of old gift certificate holders that I'll be using to present these awards to the students. I personalized each artist's award with their chosen artwork, name, and grade. I plan on printing the YAM logo onto oval shipping labels and putting them on the outside of the gift certificate holders for added pizzazz. 


Stay tuned! For YAM you can look forward to a week of "drawing challenges" which I plan on sending home with kids over spring break and three weeks of "mystery artists" for the weeks we are in school.