I'm a little in love with how this project turned out. There are a few that look a bit...well, Picasso-y, but many are completely adorable! It also has a lot of content! Here's what we did...
First, I told them that I was going to teach them about a very important tool that artists use called a color wheel. I put an image of a color wheel on the SmartBoard and explained that artists use the color wheel to choose which colors will work best in their work of art. I drew a line between warm and cool colors and then explained the two color groups. We then played a game. I would say a color and if they thought is was a warm color they'd fan their faces. If they thought it was a cool color they'd wrap their arms around themselves like they were shivering. They had a lot of fun with the game, and I was able to see how they were understanding. Of course, many watched their friends but it still helped them to get which colors were in each group so I'm fine with that.
After our warm/cool game I demonstrated how to glue strips neatly, using tiny dots of glue. I cut paper into half inch strips and put them into trays of warm and cool. I asked them to choose from one tray of colors for all of the stripes.
After these were dry I drew on the back to ensure students would get all of the zebra body parts out of the page. I drew a straight line about the middle of the page vertically. A little above the halfway mark on the right I created a rectangle and added stripes below it for the neck and four legs. When the students arrived for the next class I had them draw a large oval in the biggest portion of paper and a medium oval in the other square. I showed them how to cut all those pieces out as well as create ears from the corners and place it into a zebra. When their pieces were cut out they were instructed to choose either white or black for the back and a color the opposite color group from their stripes. They glued the color to the black or white and then glued down the zebra. I was sure to tell them to glue the body and head only in the middle so they'd be able to lift the edges for the mane and tail next class.
For the final class, I created a tray of black strips of paper and white squares and another tray with pieces of black yarn for each table. I showed the kids how to create a fringe on the black strip and how to measure how long they'd need to be along the neck of the zebra. I encouraged them to add some between the ears too. The white square was for them to draw and cut a circle to create an eye. They were allowed Sharpies to add the pupil, a nostril, and hooves if they wanted them. Finally, they made a large puddle of glue under the back of the body, folded a few pieces of yarn in half and glued the tail down.
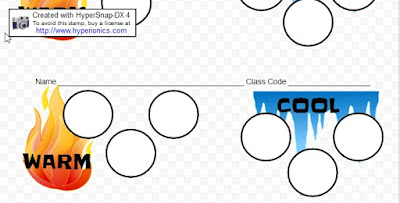
When the projects were complete, students were asked to fill in the assessment pictured below. Most of these kiddos can't read yet, so I put images of fire and ice to help them know what colors I was looking for on each side. For the full assessment, click here.


No comments:
Post a Comment